
Set up a booking page with Calendar appointment schedules
Updated For Google Workspace

An appointment schedule gives you a booking page link. Clients pick a free slot, and the appointment lands in your Google Calendar without back-and-forth messages.
What your plan includes
Section titled “What your plan includes”What you can do depends on your Google Workspace plan.
- Business Starter: one booking page. Calendar may already have created one for you, listed under Booking pages on the left.
- Business Standard and higher: more than one booking page. Some booking extras, such as checking availability across several calendars and co-hosts, also depend on your plan.
To move to a higher plan, see licences & renewal or our pricing page.
Set up your booking page
Section titled “Set up your booking page”Do this in Google Calendar on a computer.
-
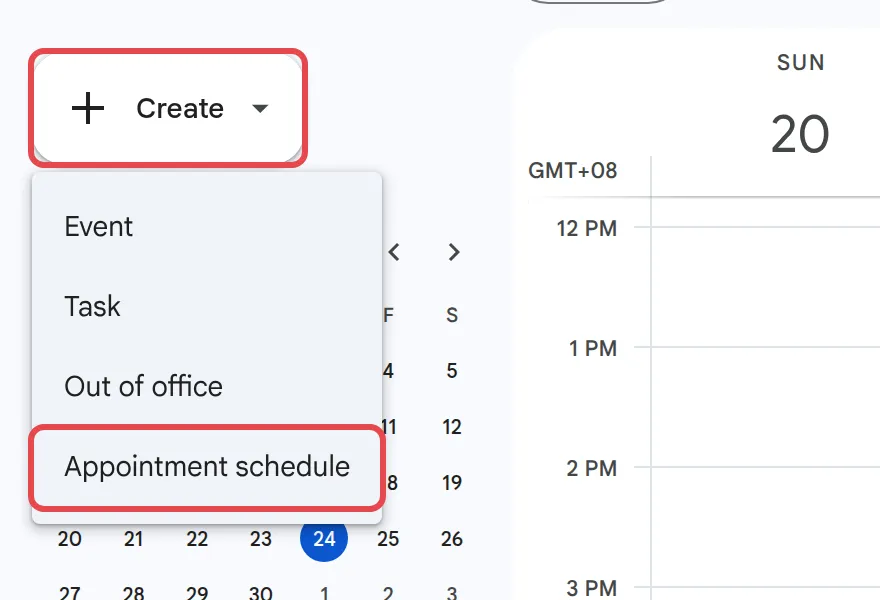
Click Create, then Appointment schedule.
-
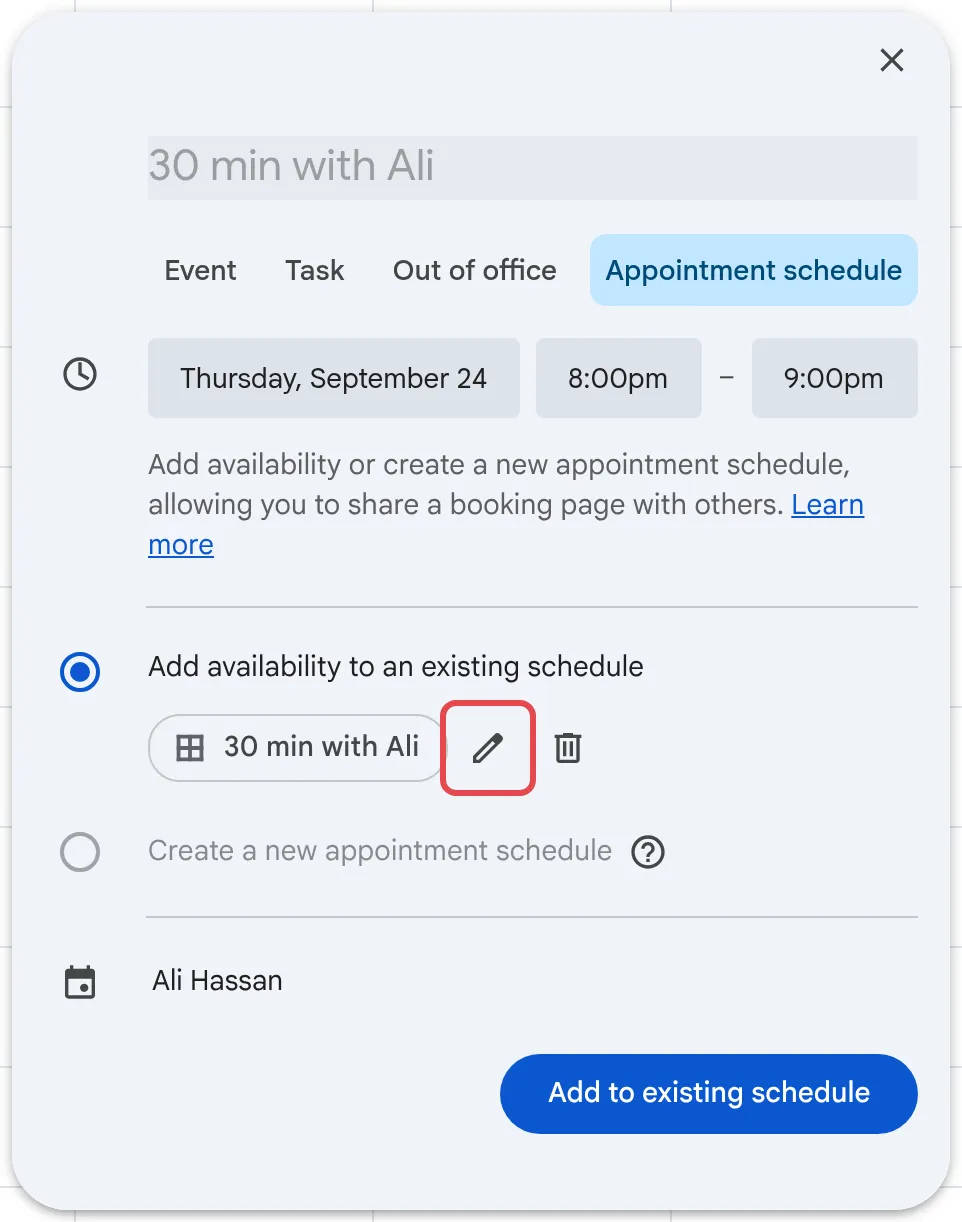
If you already have a schedule, click the pencil icon next to it under Add availability to an existing schedule. Otherwise choose Create a new appointment schedule.
-
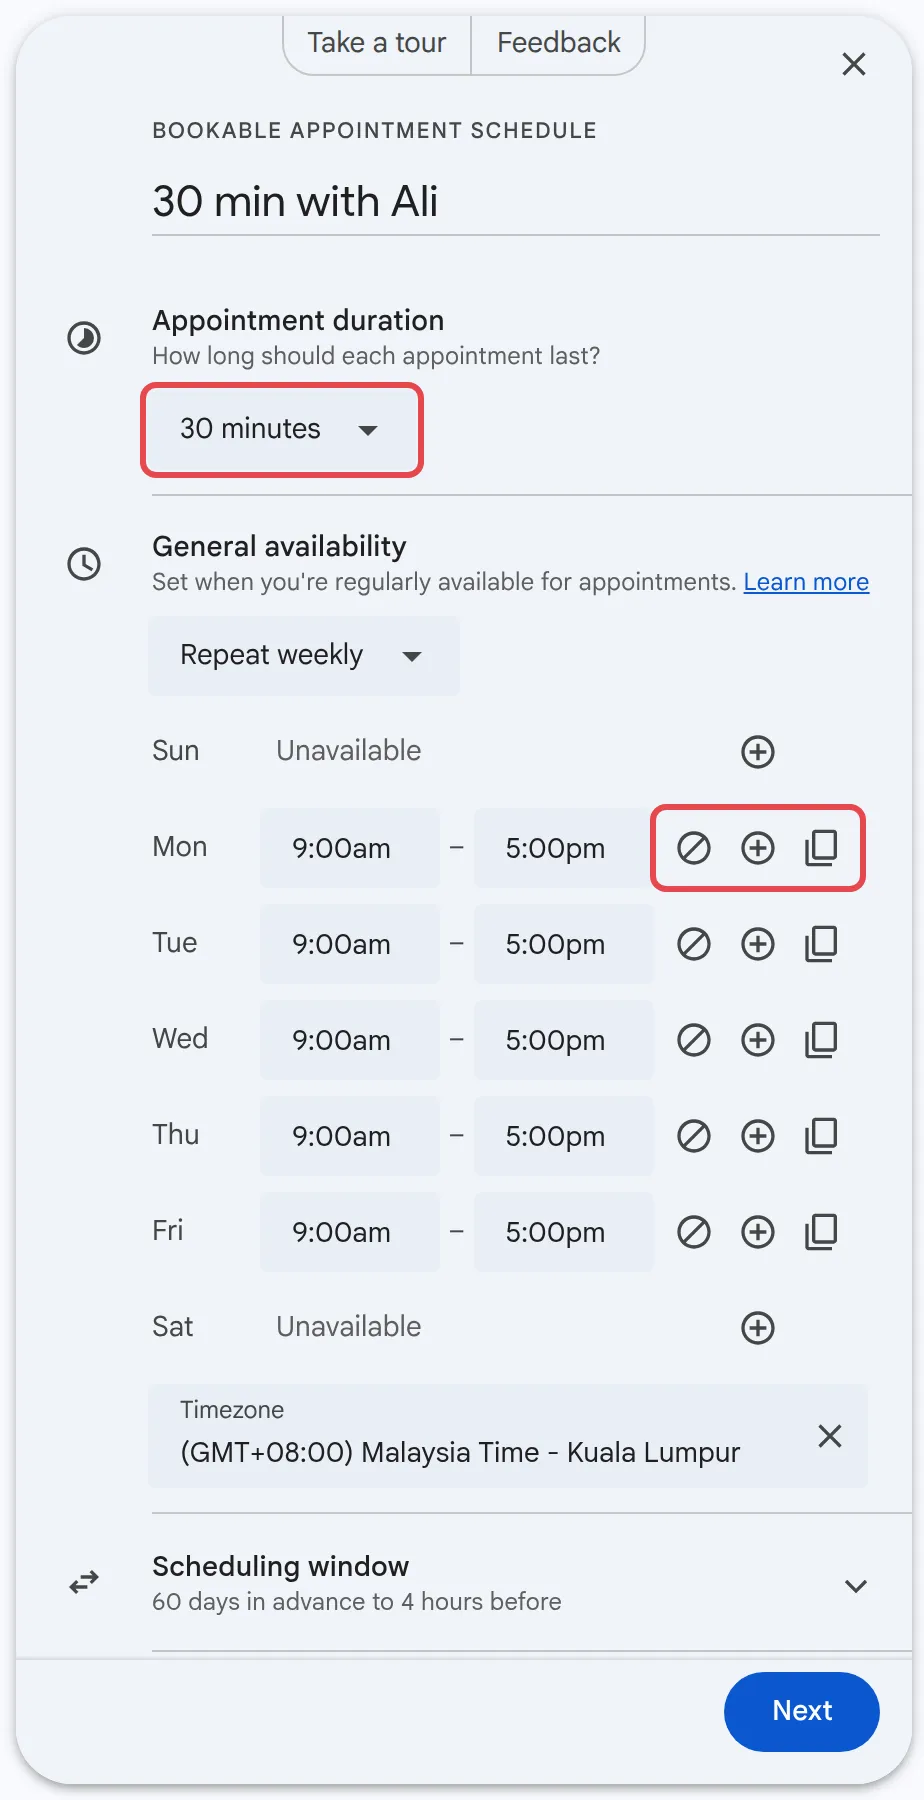
Set Appointment duration, for example 30 minutes.
-
Under General availability, set the days and times people can book. Click Unavailable all day for days off, or Copy time to all to repeat a day’s hours.
-
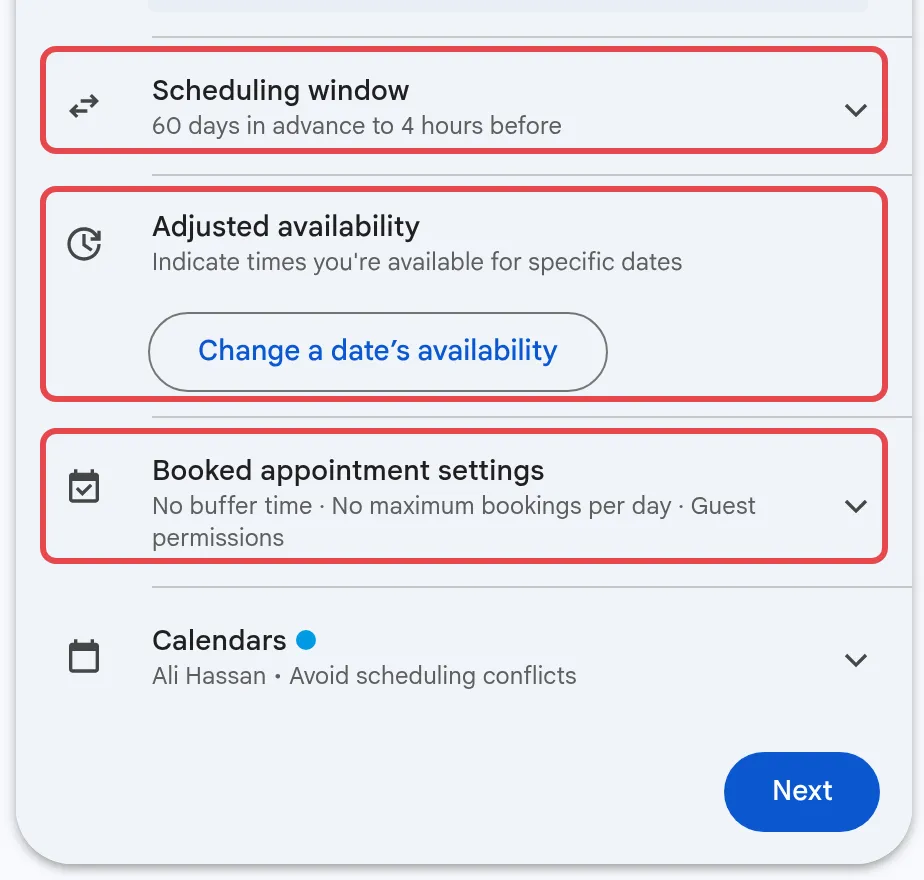
Under Scheduling window, choose how far ahead people can book and how much notice you need.
-
Under Adjusted availability, block out specific dates such as public holidays.
-
Under Booked appointment settings, add buffer time between appointments or a daily limit.
-
Click Next.
Set how you meet
Section titled “Set how you meet”The second screen controls what clients see on your booking page.
-
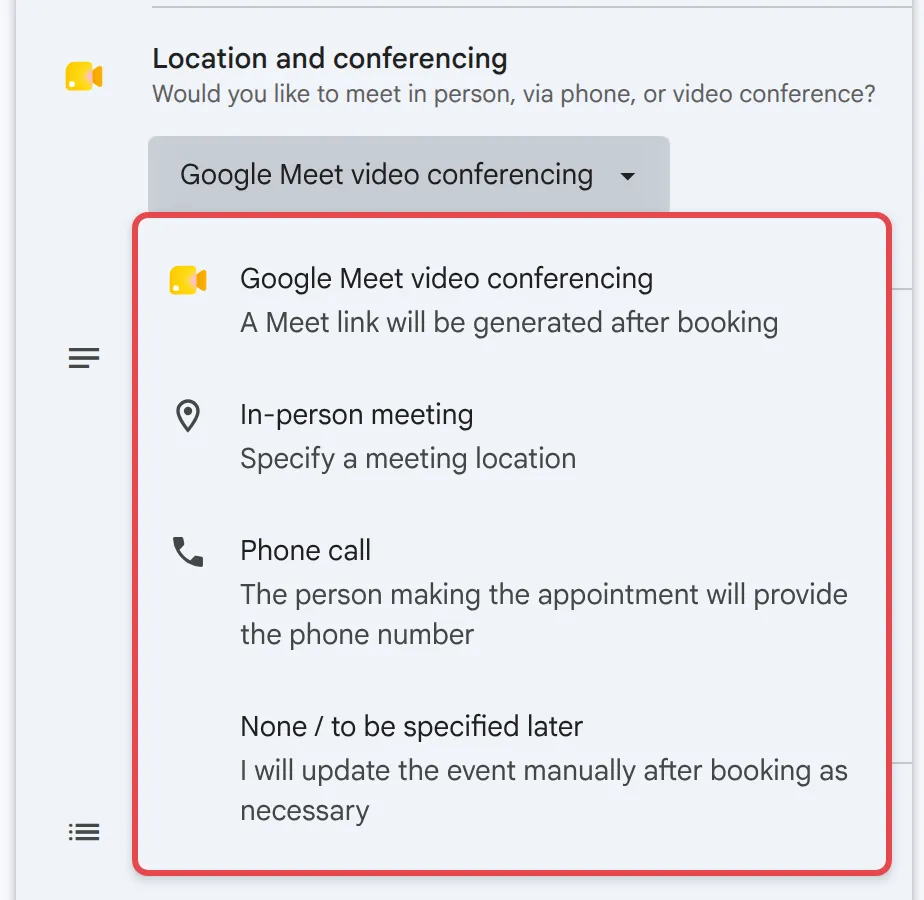
Under Location and conferencing, open the dropdown. It is set to Google Meet video conferencing by default. You can change it to In-person meeting, Phone call or None / to be specified later.
-
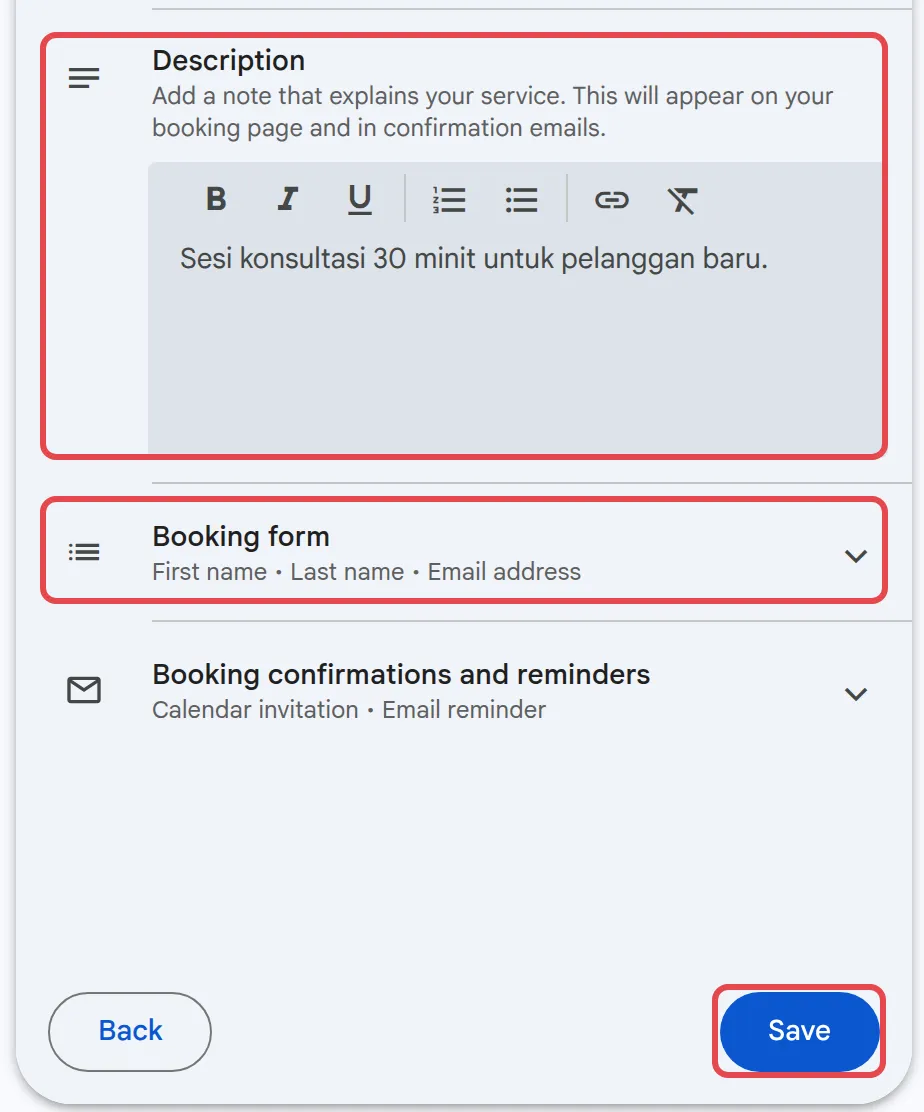
Add a short description of what the appointment is for.
-
Check the Booking form. It asks for First name, Last name and Email address; click Add an item to ask for more, such as a company name.
-
Check Booking confirmations and reminders. By default, clients get a Calendar invitation and an Email reminder, even on Business Starter.
-
Click Save.
Share your booking link
Section titled “Share your booking link”Give clients the link wherever they already talk to you.
-
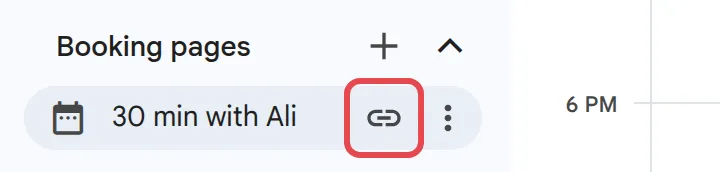
Under Booking pages on the left, click Copy link next to your schedule.
-
Paste it into an email, your email signature, a WhatsApp message or your website.
Your booking page hides times when your calendar already shows you as busy, so keep your calendar up to date.
Still stuck
Section titled “Still stuck”WhatsApp our support team at +60 16-916 3324.
Common issues
Can clients without a Google account book with me?
Yes. They open your booking page link, pick a free slot and fill in their first name, last name and email address. They get a confirmation email and the booking appears on your calendar.
Why can't I create a second booking page?
On Business Starter you get one booking page. More than one needs Business Standard or higher, and some booking extras, such as checking several calendars, also depend on your plan. Compare plans on our pricing page.
Can I set this up in the Calendar app on my phone?
No. Appointment schedules are created and edited in Google Calendar on a computer. Bookings still show in the phone app.
Was this article helpful?
Thanks for your feedback.
Sorry this didn't help. WhatsApp us and we'll sort it out with you.