
Ask an AI about this page
 ChatGPT
 Claude
 Perplexity
 Google AI Mode
 Microsoft Copilot
 Grok
Grok Mistral Le Chat
Set up a simple approval with Power Automate
To set up a simple approval, build an instant cloud flow with the Start and wait for an approval action. When you run the flow, your approver gets an email (and a Teams notification) with Approve and Reject buttons. Once they answer, the flow carries on, for example by emailing you the outcome. Approvals are a standard connector, included in Microsoft 365 business plans.
We tested these steps on 27 September 2026 with a sample leave request, “Contoh - Borang cuti”: Ali Hassan requested leave and Siti Aminah approved it from Outlook on the web.
Create the flow with a form for the request
Section titled “Create the flow with a form for the request”An instant cloud flow starts when you press Run. Its inputs work like a small form.
-
In Power Automate, select Create → Instant cloud flow.
-
Name the flow, for example
Contoh - Borang cuti, select Manually trigger a flow, and select Create. -
Select the Manually trigger a flow step, then Add an input → Text. Name it
Tarikh cuti. In the second box, type a hint such asContoh: 6 hingga 8 Okt 2026. -
Add a second Text input called
Sebab.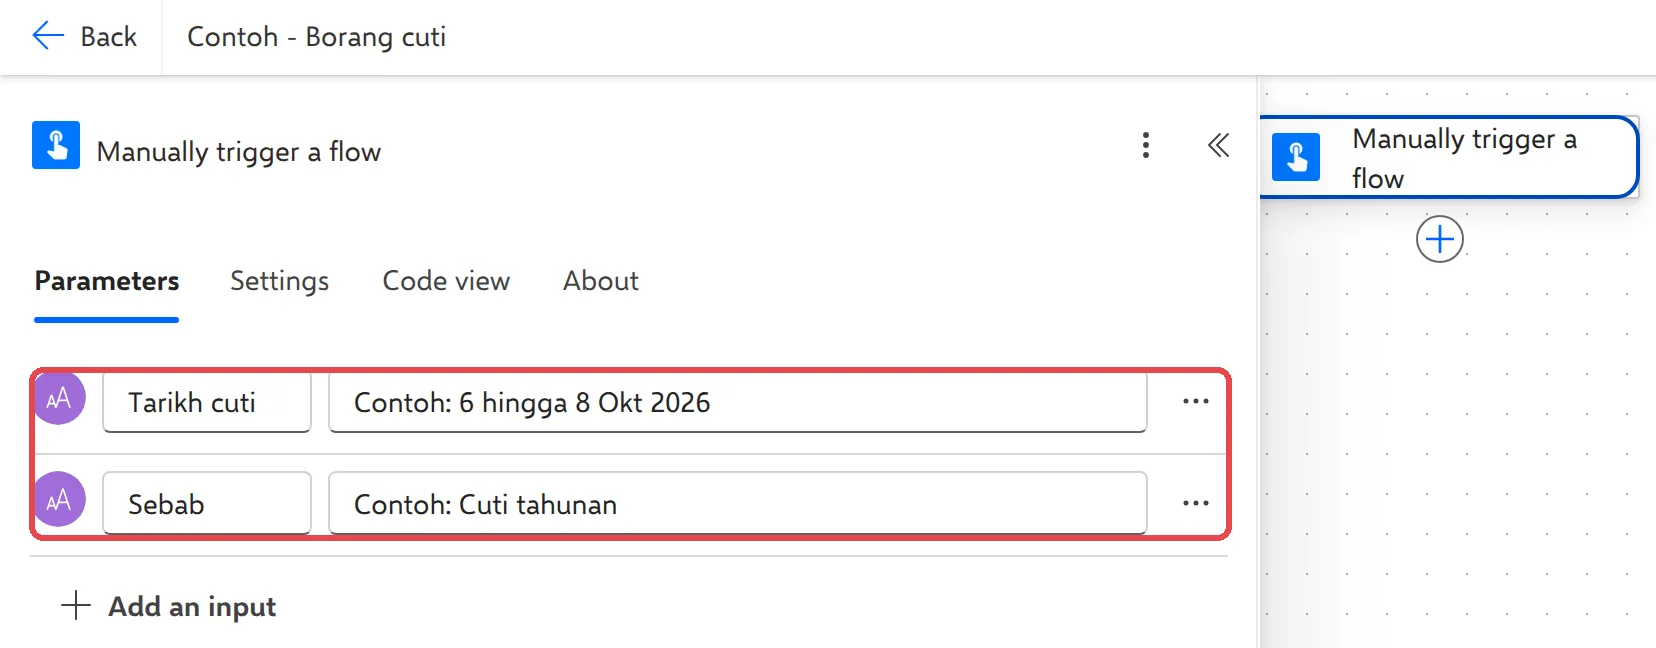
Add the approval
Section titled “Add the approval”This step sends the request and waits for the answer.
-
Under the trigger, select + → Add an action, search for
Start and wait for an approvaland select it. The first time, select Create new to connect to approvals. -
Set Approval type to Approve/Reject - First to respond.
-
In Title, type
Contoh - Permohonan cuti. -
In Assigned to, type your approver’s name and select them.
-
In Details, type
Tarikh:, then select the lightning icon (or type/→ Insert dynamic content) and pick Tarikh cuti. On a new line, do the same withSebab:and Sebab.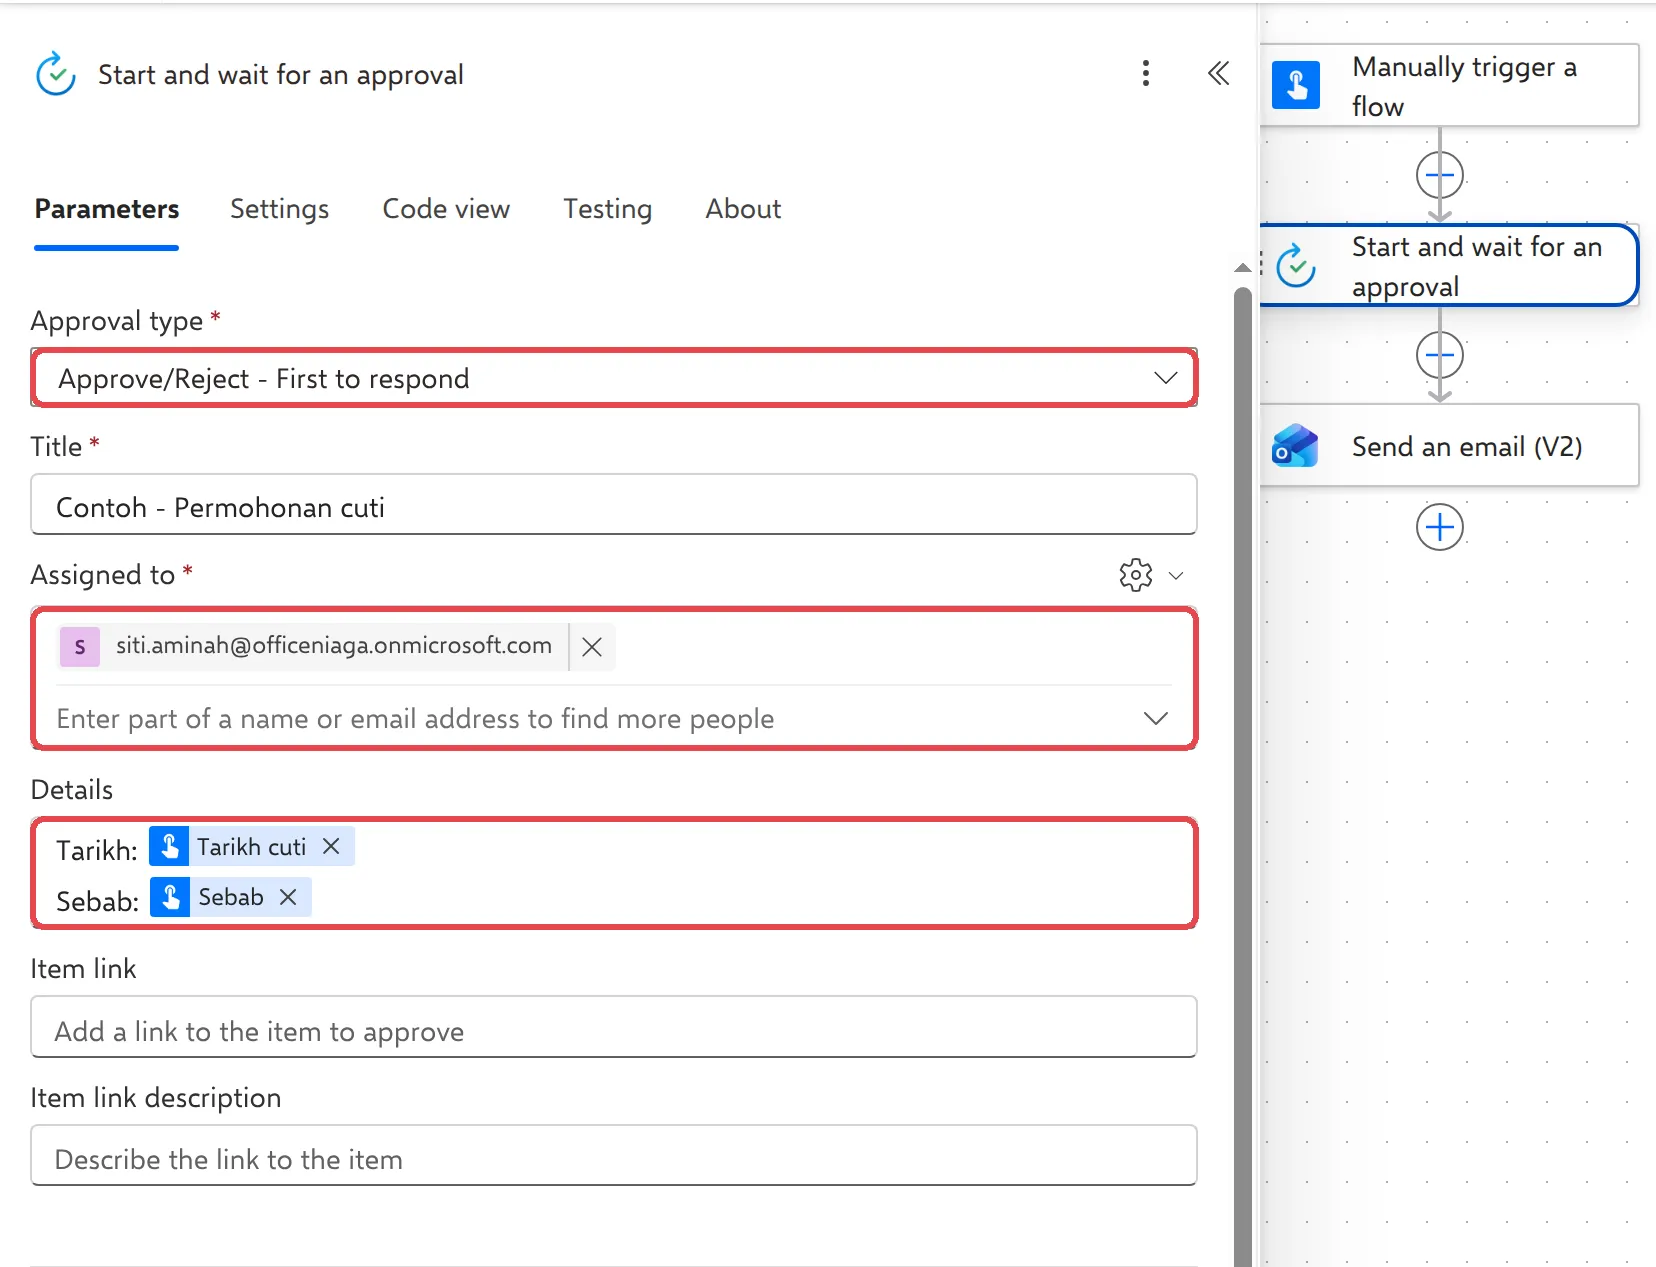
Email the outcome to the requester
Section titled “Email the outcome to the requester”After the approval, the flow tells the person who asked.
-
Select + → Add an action, search for
Send an email (V2)and select it (Office 365 Outlook). -
In To, select the gear icon → Use dynamic content, then pick User email (the person who ran the flow).
-
In Subject, type
Contoh - Keputusan cuti:and add Outcome from the approval. -
In Body, type
Keputusan:and add Outcome again.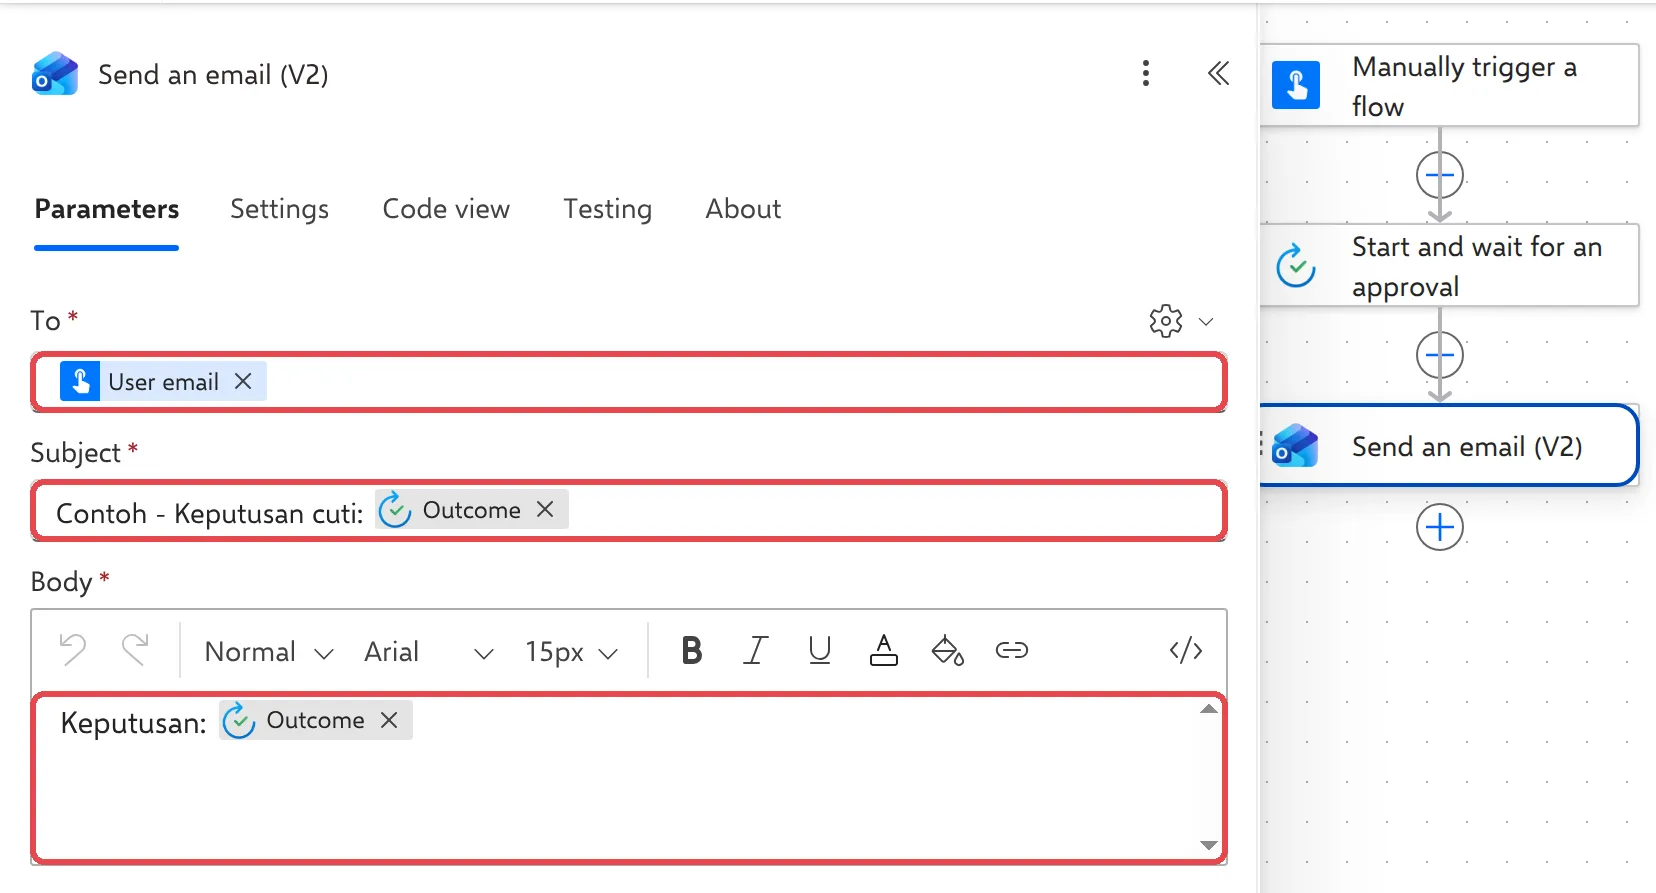
-
Select Save.
Outcome is Approve or Reject.
Send a request
Section titled “Send a request”You or your staff run the flow each time someone needs leave.
-
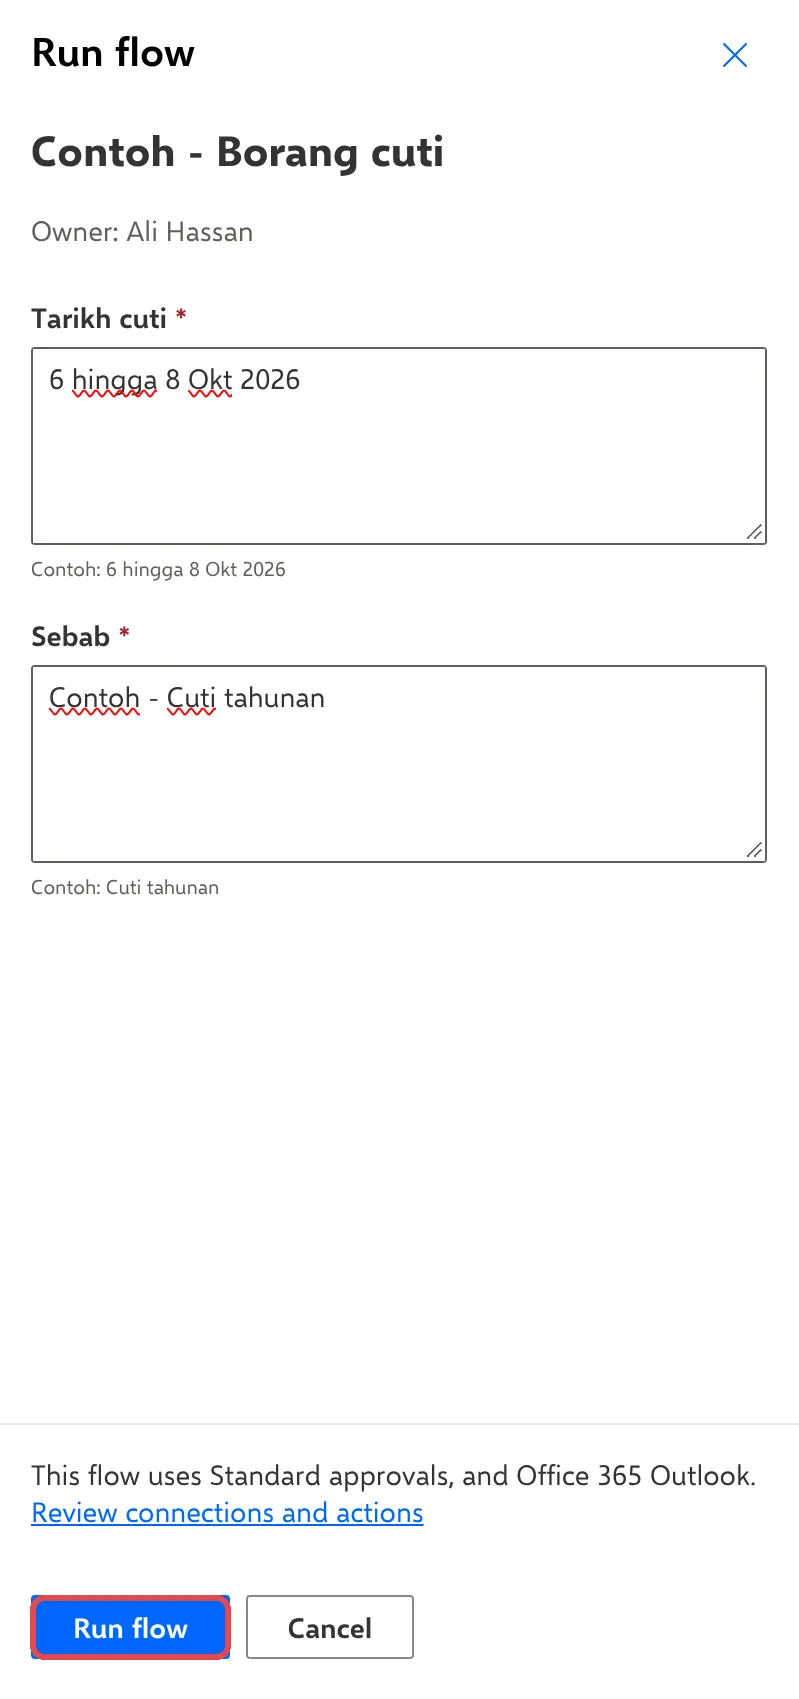
Open the flow and select Run (in the designer, Test → Manually → Test). You can also run it from the Power Automate phone app.
-
Fill in Tarikh cuti and Sebab, then select Run flow.
Approve or reject (for the approver)
Section titled “Approve or reject (for the approver)”The approver gets an email from Microsoft Power Automate with the details and two buttons. The same request appears in the Approvals app in Teams.
-
Open the email and select Approve or Reject.
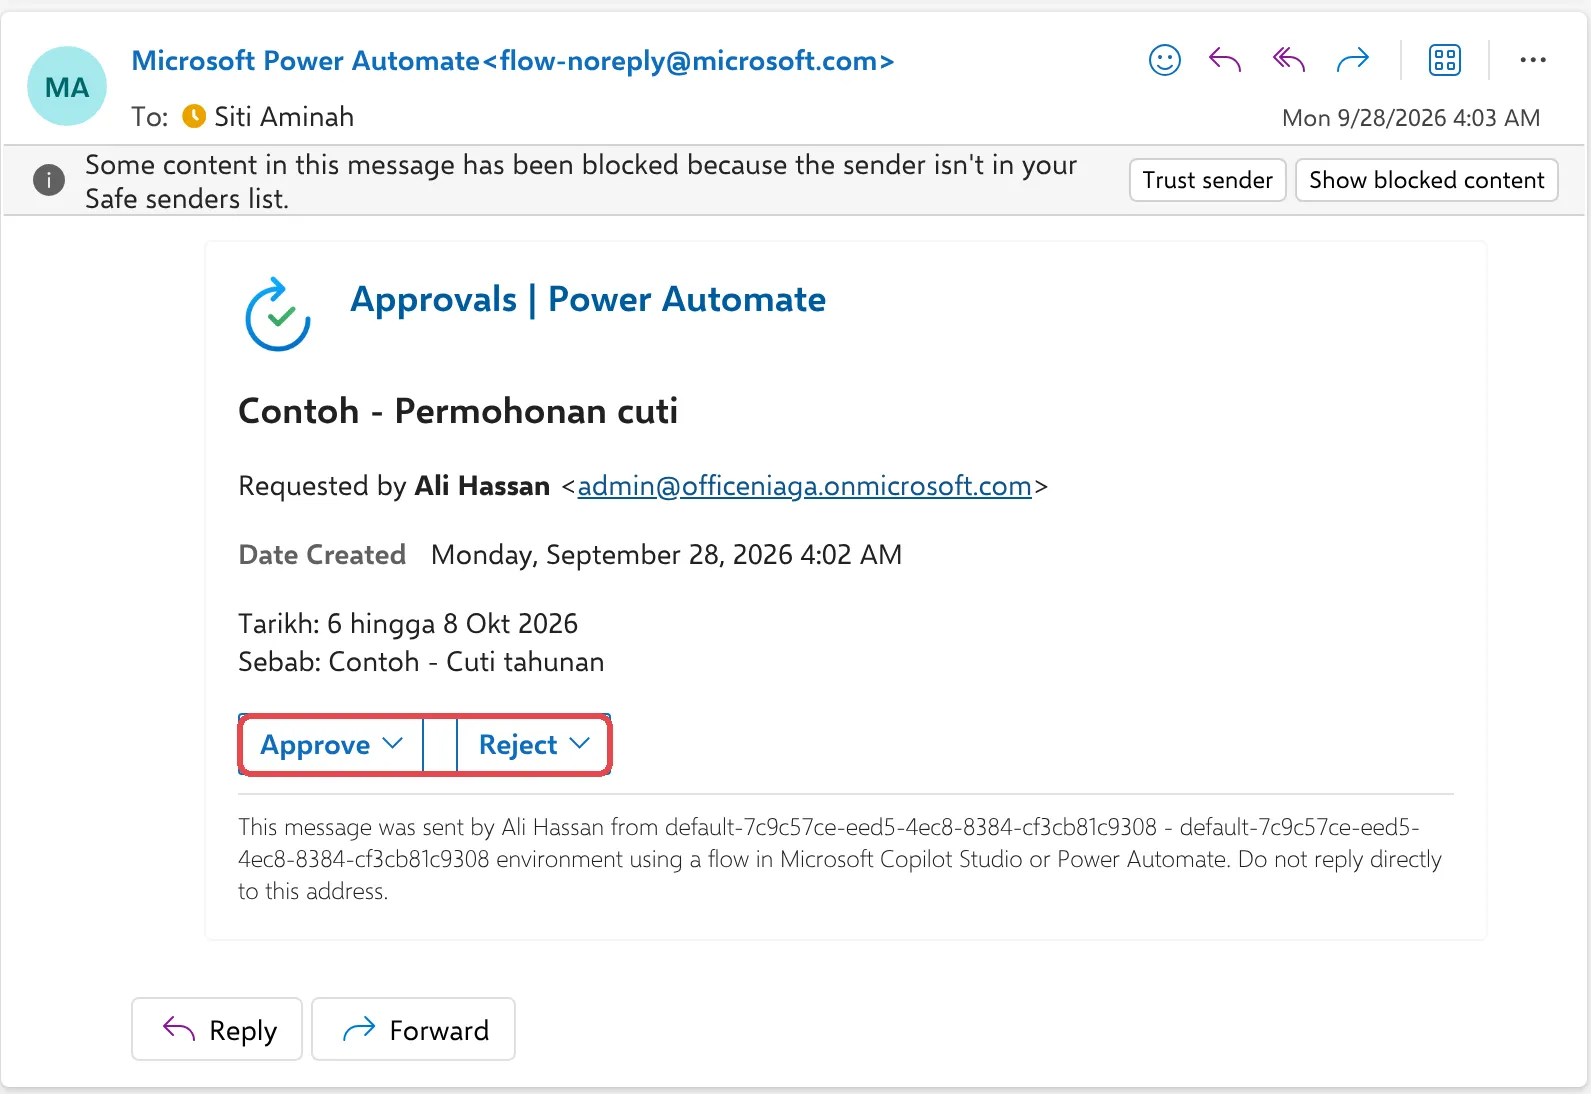
-
Type a note in Comments if you like, then select Submit.
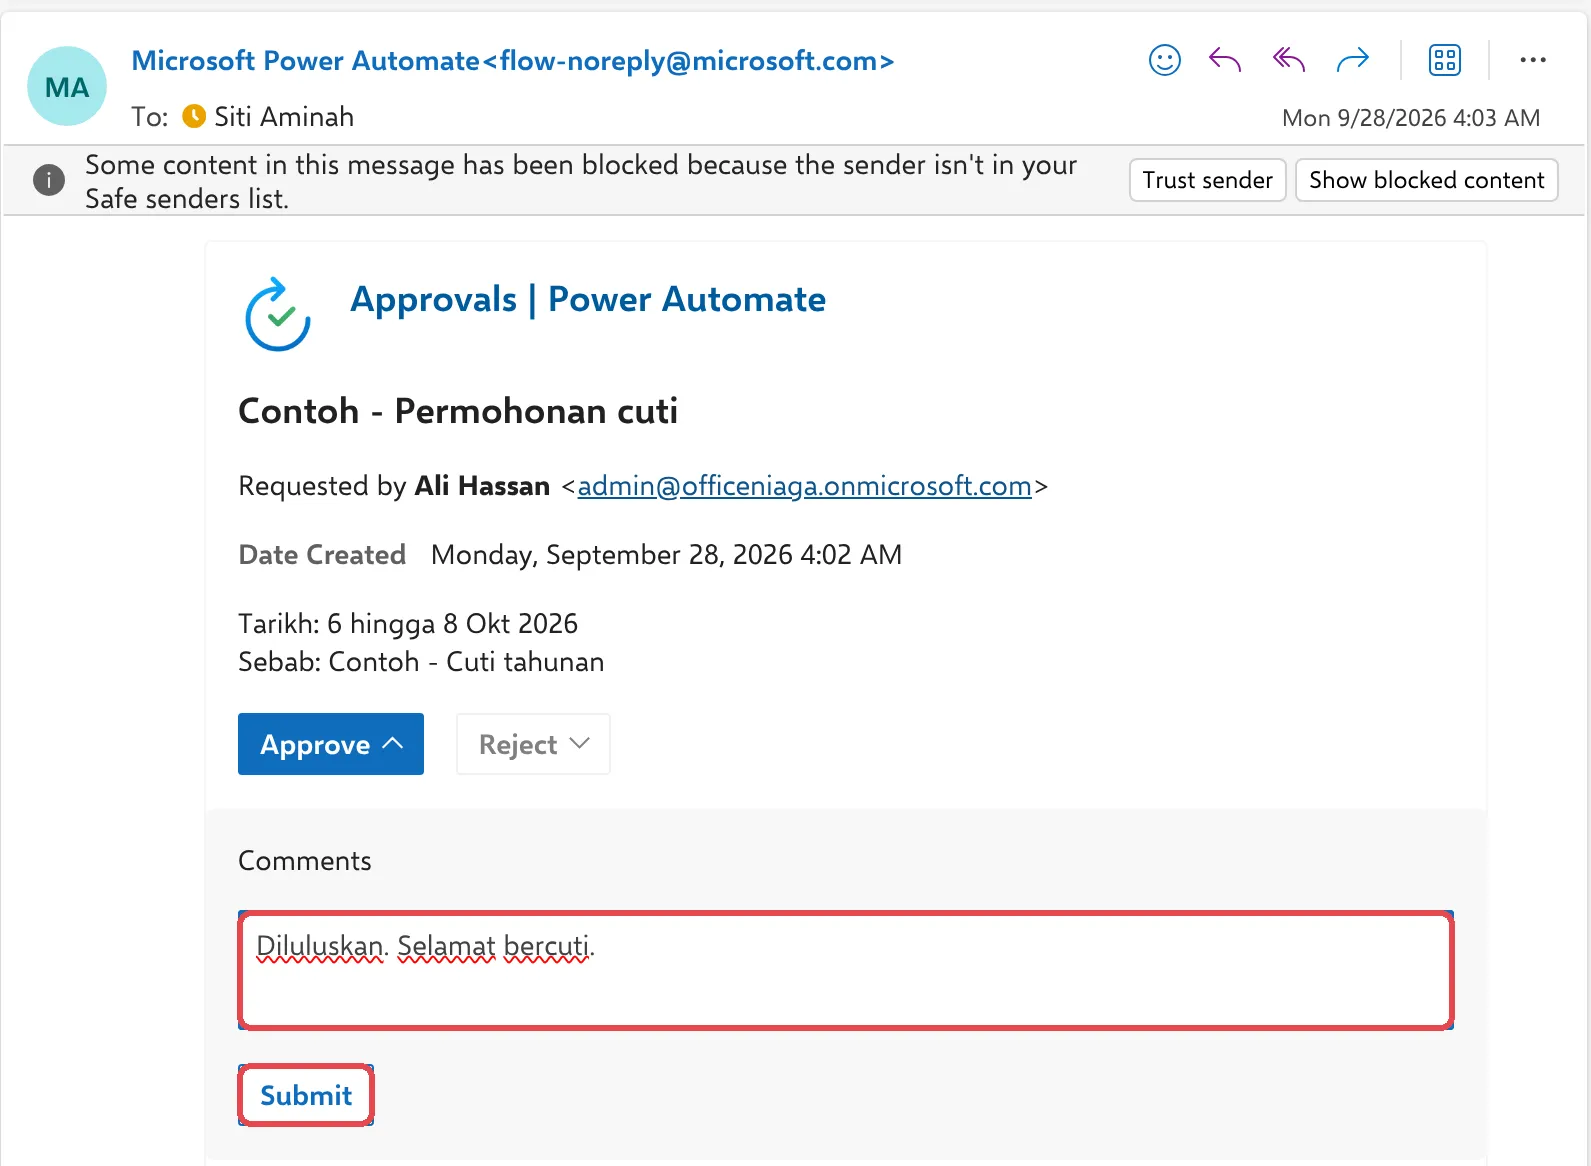
The email changes to show Approved or Rejected, with the date.
See the result
Section titled “See the result”The requester gets the outcome email a few seconds later. In the flow’s run history, the run shows each step with a green tick and how long the approval waited.
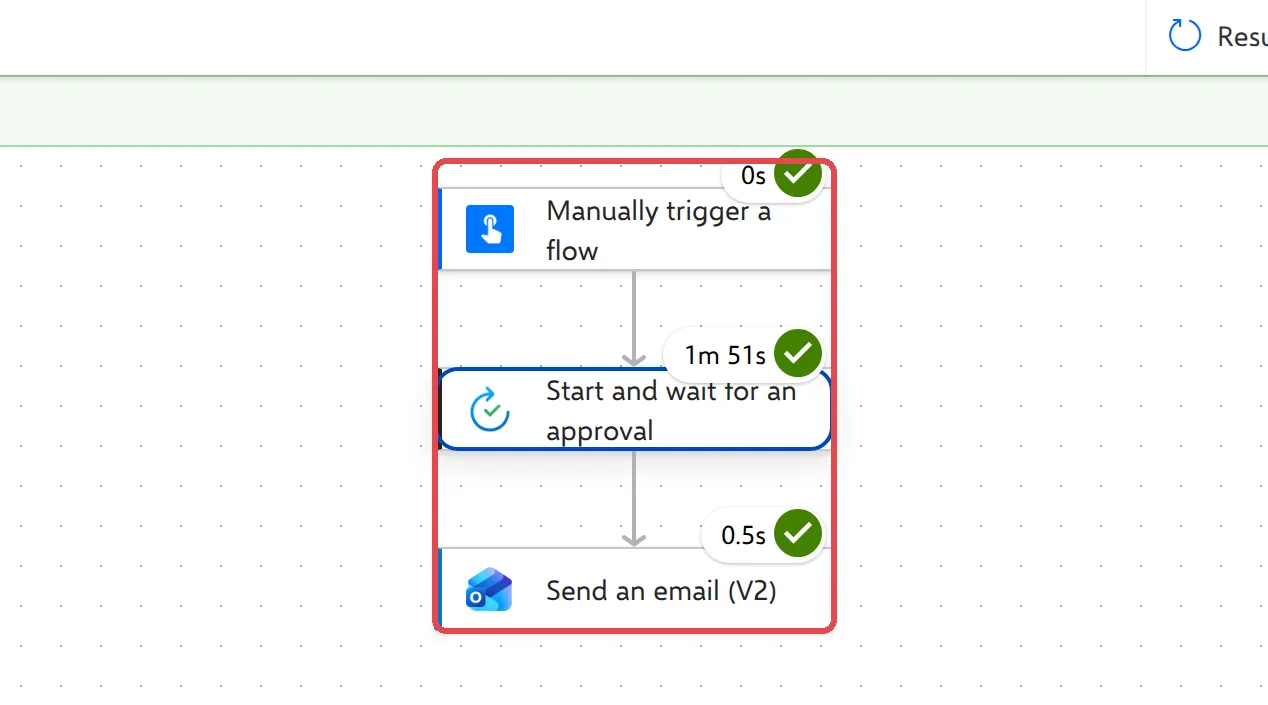
Microsoft describes approvals in create and test an approval workflow.
Still stuck
Section titled “Still stuck”WhatsApp our support team at +60 16-916 3324.
Common issues
My approver says the Approve and Reject buttons don't show in the email.
Outlook hides them when it blocks content from senders it doesn't trust. Ask them to select Show blocked content at the top of the email, or to answer in the Approvals app in Teams, or at make.powerautomate.com under Approvals.
How long does an approval wait?
Up to 30 days. If nobody answers by then, the run stops and shows as failed in the run history. Start a new request if you still need it.
Can more than one person approve?
Yes. Add several people in Assigned to. With Approve/Reject - First to respond the first answer decides. With Approve/Reject - Everyone must approve the flow waits for everyone, and one rejection rejects the request.
Can the approver add a note?
Yes. After choosing Approve or Reject, they can type in Comments before selecting Submit. You can add the comments to your email with the dynamic content Response summary.
Where do I see all the approvals I've sent or received?
In Power Automate, select Approvals on the left, or open the Approvals app in Teams. Both show received and sent requests and their history.
Was this article helpful?
Thanks for your feedback.
Sorry this didn't help. WhatsApp us and we'll sort it out with you.