
Connect your own domain to Microsoft 365
Updated For Microsoft 365

To use your own address, such as name@yourcompany.com, add your domain in the Microsoft 365 admin centre under Settings > Domains, prove you own it with a TXT record, then add the DNS records Microsoft lists. Office Niaga can do all of this for you: just WhatsApp us.
Before you start
Section titled “Before you start”Gather these before you begin, so the setup does not stall halfway:
- An admin account with the Domain Name Administrator or Global Administrator role.
- A login to the place where your domain’s DNS is managed (your domain registrar or hosting provider). If you are not sure where that is, ask Office Niaga.
- A list of every email address in use today, so each one exists in Microsoft 365 as a user, alias or shared mailbox.
Add and verify the domain
Section titled “Add and verify the domain”Verification only proves you own the domain. It does not change your email yet.
-
Sign in to admin.microsoft.com.
-
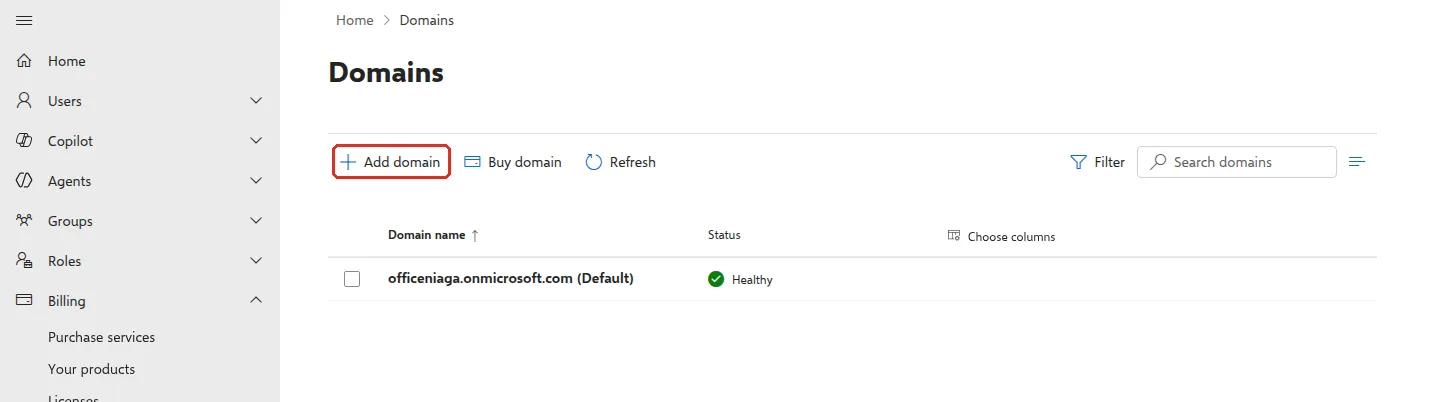
Go to Settings > Domains. If you cannot see Settings, select Show all first. The list starts with your free
yourcompany.onmicrosoft.comaddress. -
Select Add domain.
-
In Domain name, type your domain (for example
yourcompany.com) and select Use this domain at the bottom.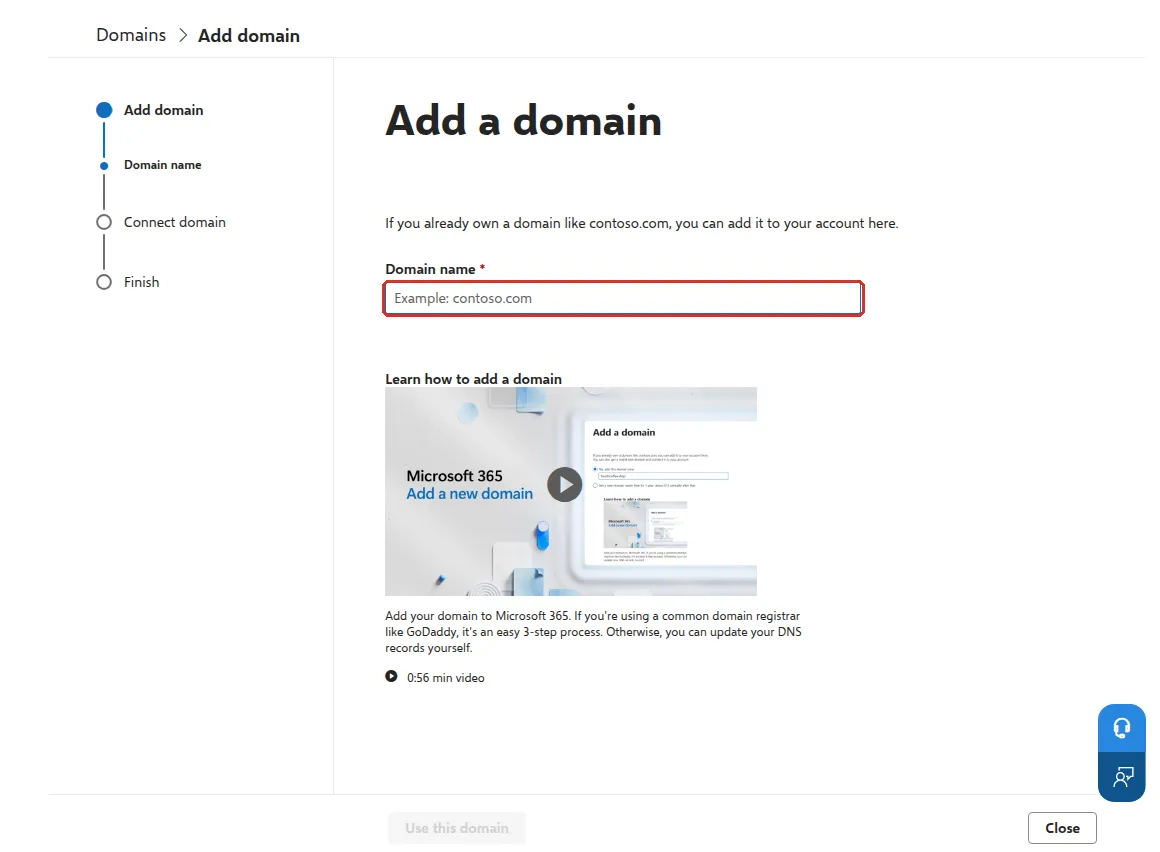
-
On Verify you own your domain, choose Add a TXT record to the domain’s DNS records and select Continue.
-
Copy the TXT value Microsoft shows. In your DNS manager, add a TXT record with host
@and that value. -
Back in the admin centre, select Verify. If it fails, wait a few minutes and try again.
If your DNS host supports automatic setup (Microsoft calls it Domain Connect), you may be offered to sign in to it and let Microsoft add the records for you. Automatic setup can remove your existing MX records at the same time, so only use it when you are ready to move email.
Add the DNS records
Section titled “Add the DNS records”After verification, Microsoft shows the Add DNS records page. Always copy the exact values from that page, because the MX value is unique to your domain. The main records look like this:
| Type | Host / name | Points to / value | Purpose |
|---|---|---|---|
| MX | @ |
yourcompany-com.mail.protection.outlook.com (yours will differ), priority 0 |
Delivers email to Microsoft 365 |
| TXT | @ |
v=spf1 include:spf.protection.outlook.com -all |
SPF: tells other servers Microsoft 365 may send your email |
| CNAME | autodiscover |
autodiscover.outlook.com |
Lets Outlook set itself up automatically |
Microsoft also offers optional records under Advanced options, including DKIM (two CNAME records for email signing) and device management records. Add DKIM if you can: it helps your emails avoid spam folders.
When the records are in place, select Continue and finish with Done. Delete any old MX records from your previous email host, so email does not split between two places.
Make it the default domain
Section titled “Make it the default domain”New accounts use your default domain. In Settings > Domains, select your domain and choose Set as default. This only changes accounts you create from now on.
Want us to do it?
Section titled “Want us to do it?”Office Niaga can add the domain, set up the records and plan the email move with you, so your email is not interrupted. WhatsApp us with your domain name.
Still stuck
Section titled “Still stuck”WhatsApp our support team at +60 16-916 3324.
Common issues
Will changing the MX record affect my website?
No. The MX record only controls where email for your domain is delivered. Your website uses different records, so it keeps working.
I already have an SPF record for another service. Can I add a second one?
No. A domain can have only one SPF record. Add include:spf.protection.outlook.com to your existing record instead of creating a new one. Office Niaga can check it for you.
Microsoft says it cannot verify my domain.
New DNS records usually work within minutes, but some DNS hosts take up to 48 hours. Check that you copied the TXT value exactly, with no extra spaces, and that you added it to the domain itself (host @), then select Verify again.
Was this article helpful?
Thanks for your feedback.
Sorry this didn't help. WhatsApp us and we'll sort it out with you.