
Share your webmail calendar with a colleague
Updated For SmarterMail Build 7692

Sharing lets a colleague see your calendar, for example so an assistant can manage your meetings. There are two steps: you share it, then your colleague attaches it.
Step 1: Share your calendar
Section titled “Step 1: Share your calendar”Done by the calendar owner.
-
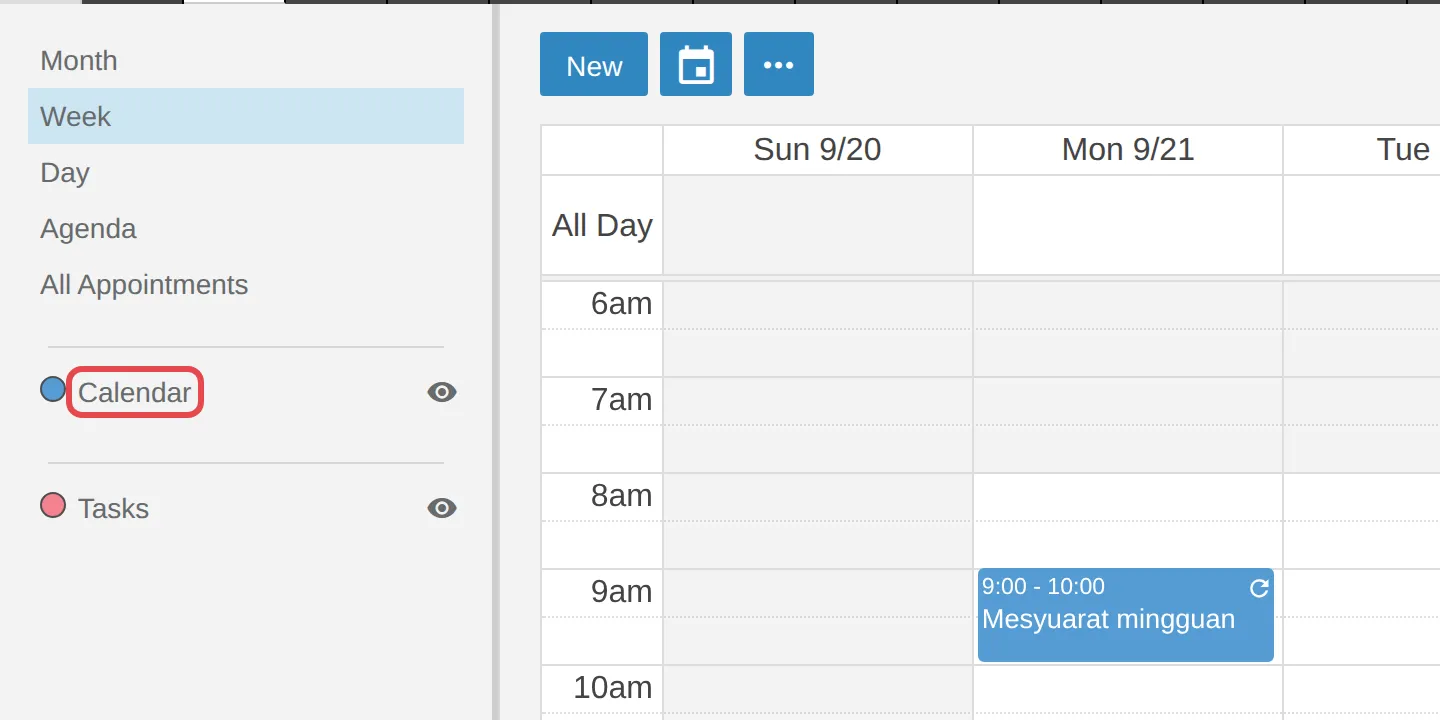
Log in to webmail and click the Calendar icon on the top bar. In the left pane, click the name of the calendar you want to share, for example Calendar.
-
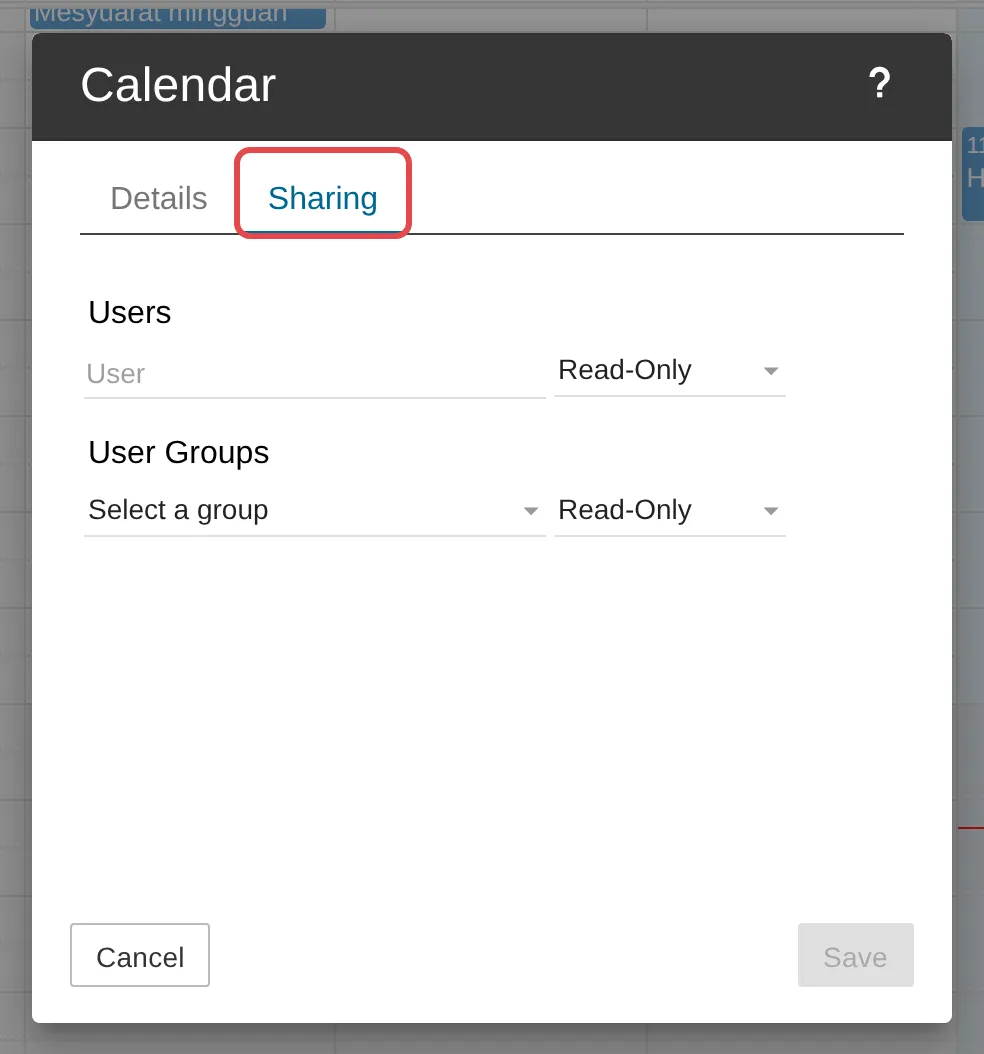
The calendar’s window opens. Click the Sharing tab.
-
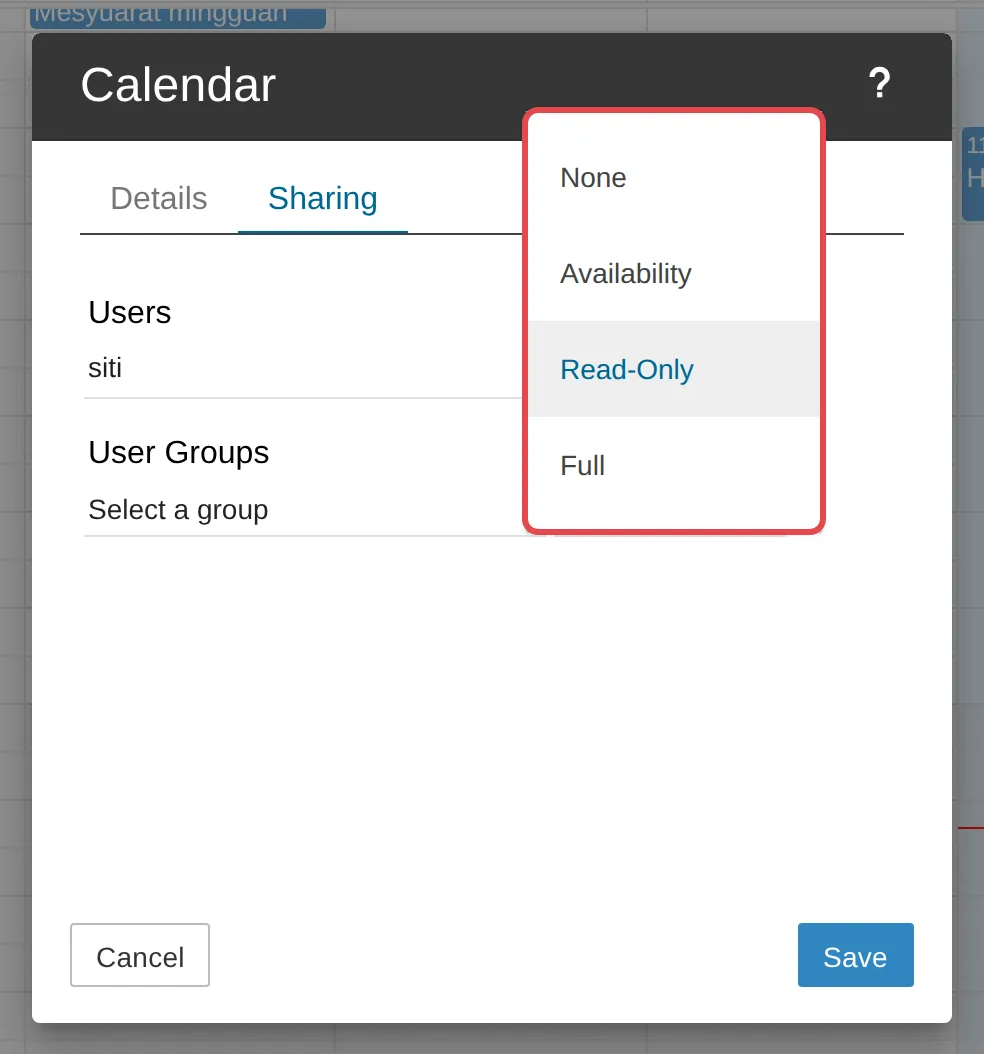
Under Users, start typing your colleague’s name in User and pick them from the list. Beside it, choose what they can do:
- Availability shows only when you are busy or free.
- Read-Only shows your appointments, but they cannot change them.
- Full lets them add, change and delete appointments.
- None gives no access. Use it to leave out one person when you share with a group.
-
To share with a whole team at once, choose a group under User Groups instead. Click Save.
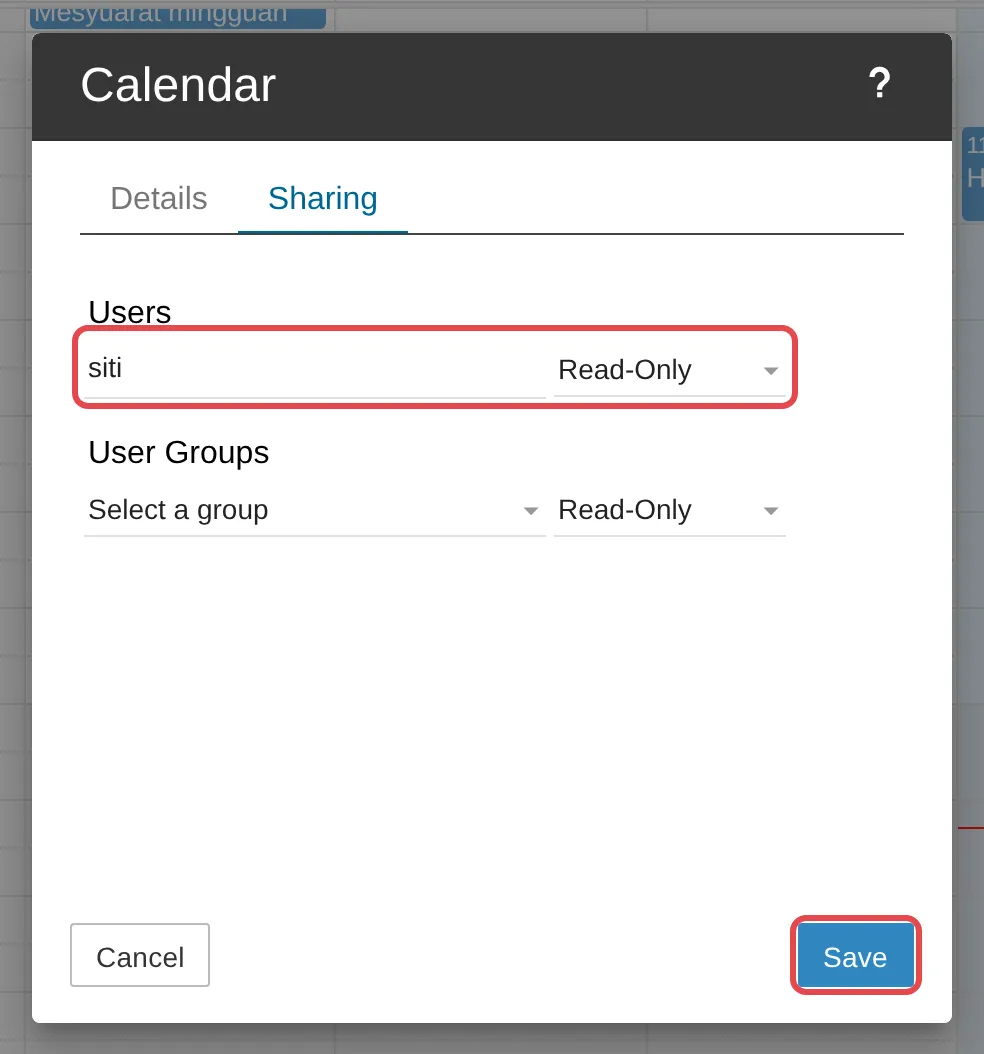
Your colleague gets a notification that you have shared a calendar with them. To stop sharing, open the Sharing tab again, change their access to None and click Save.
Step 2: Add a shared calendar to your webmail
Section titled “Step 2: Add a shared calendar to your webmail”Done by the colleague who was given access.
-
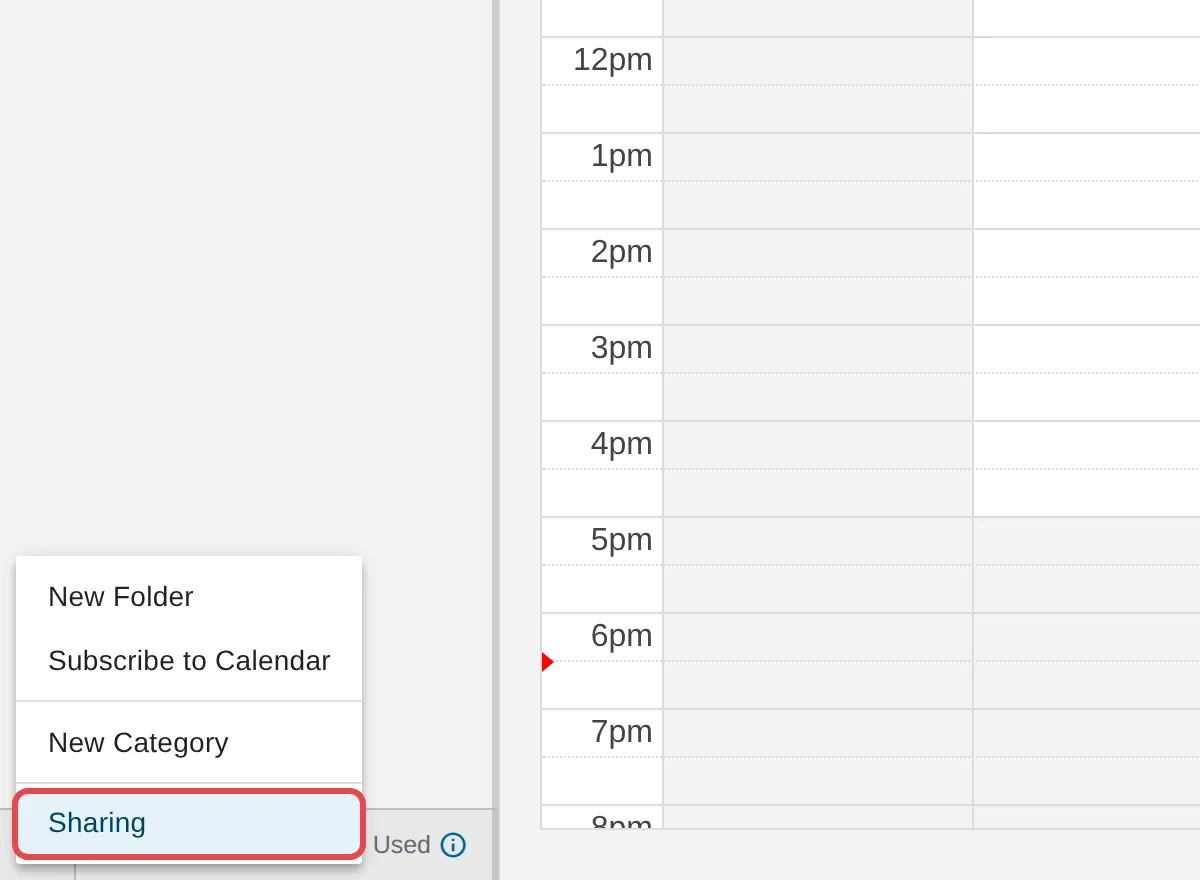
Log in to webmail and click the Calendar icon. Click the list icon at the bottom left of the calendar pane and choose Sharing. (You can also go to Settings > Sharing.)
-
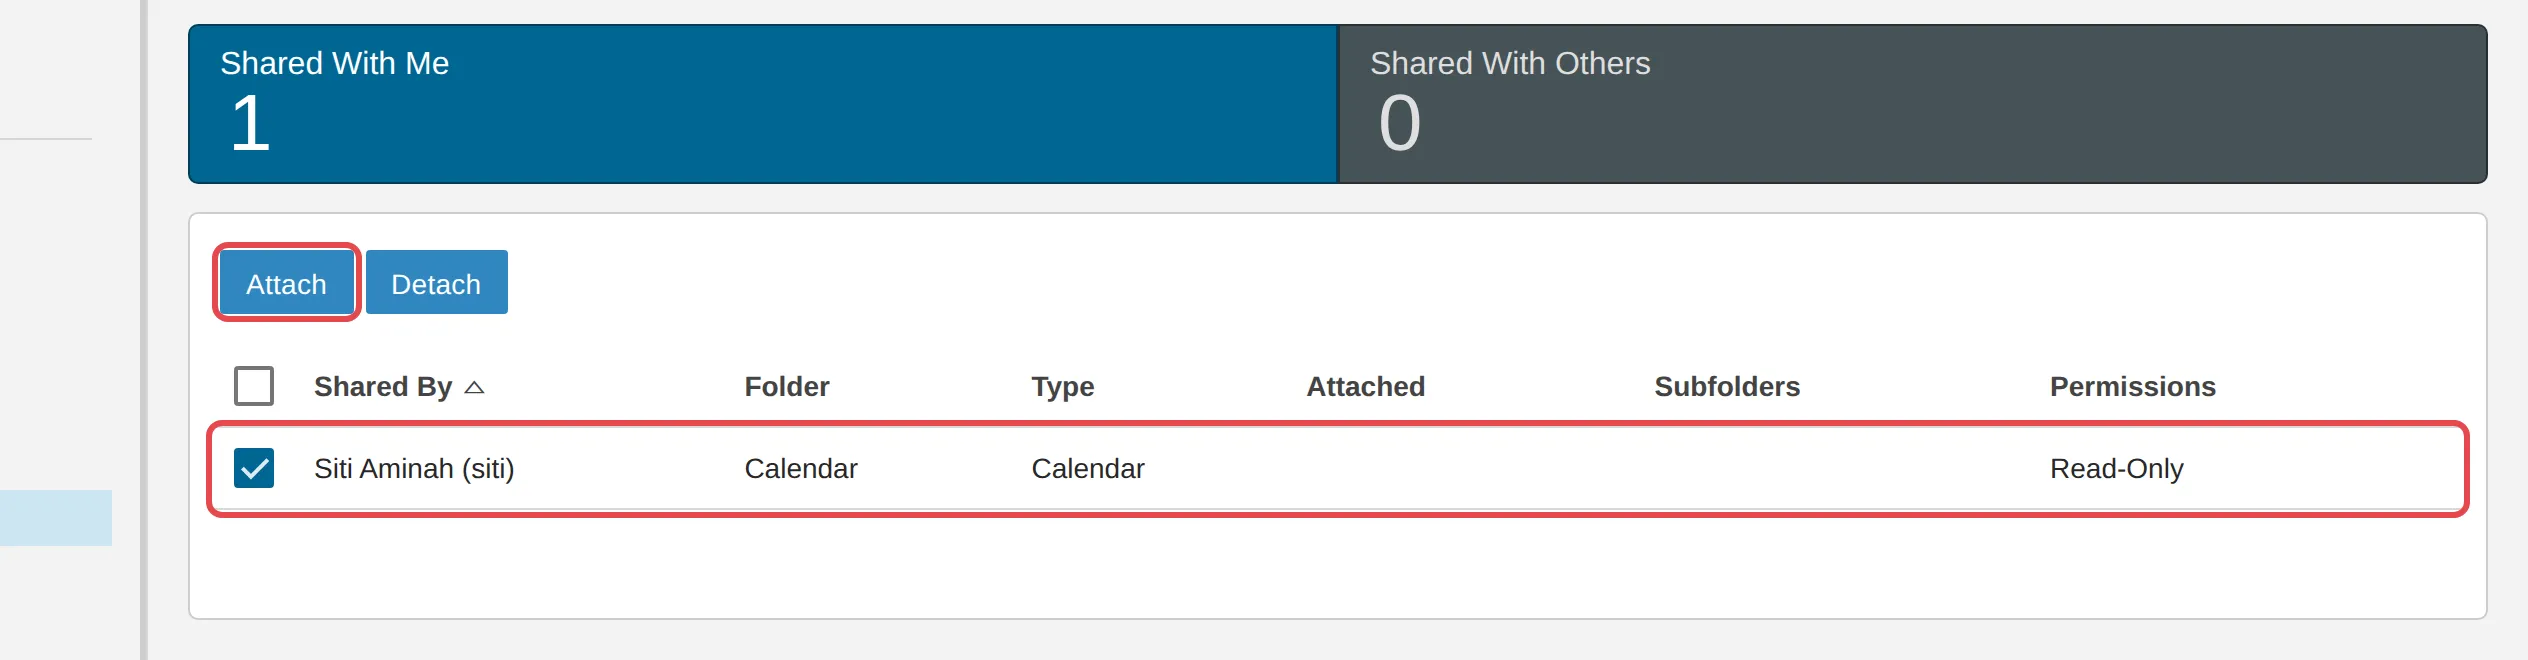
Click the Shared With Me box at the top. Tick the calendar and click Attach.
-
Go back to Calendar. The shared calendar is listed in the left pane with its own colour and eye icon. Click the eye icon to show or hide it next to your own, as in Calendar views, colours & extra calendars in webmail.
To remove it later, tick it in Shared With Me and click Detach. The owner’s calendar is not affected.
Share with someone outside the company
Section titled “Share with someone outside the company”People outside your domain cannot be added under Users, but you can give them a read-only link.
-
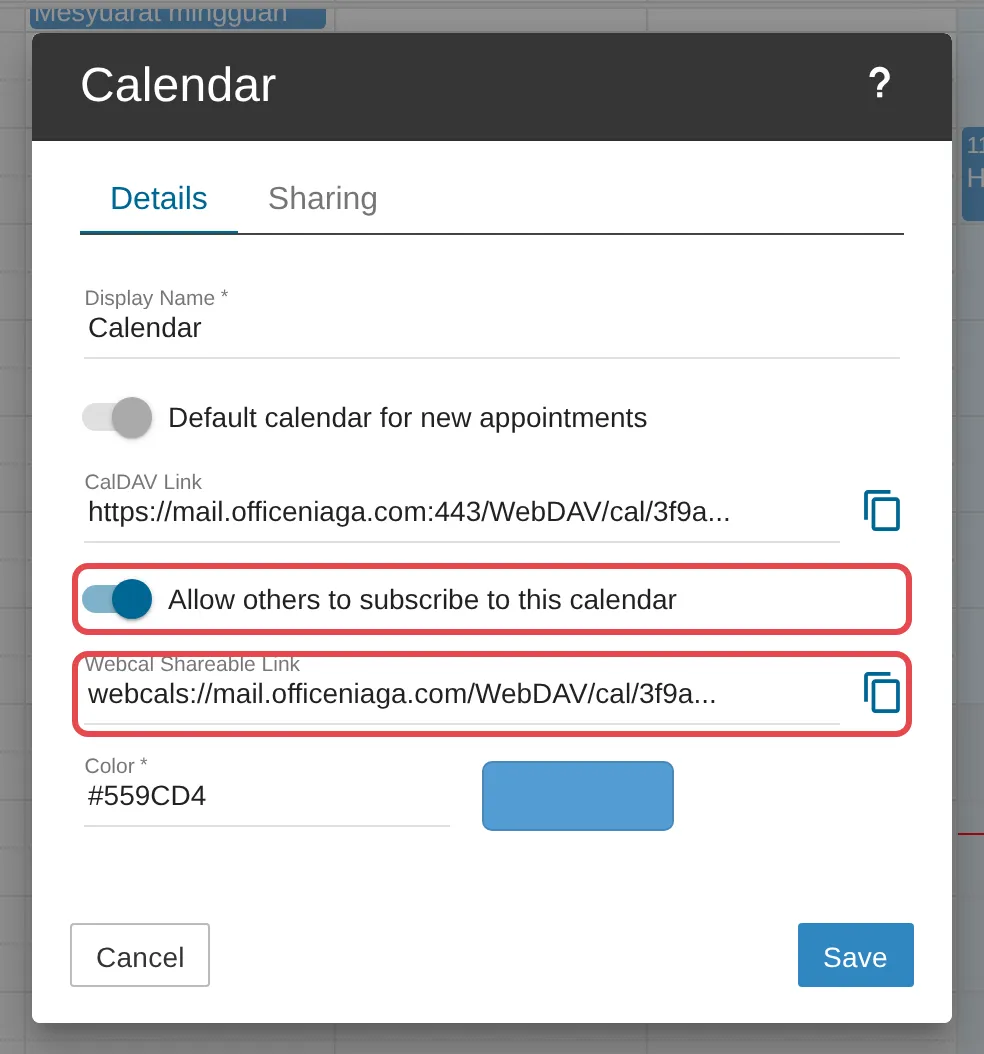
Click the calendar’s name in the left pane. The Details tab opens.
-
Turn on Allow others to subscribe to this calendar. A Webcal Shareable Link appears. Click Save.
-
Copy the link with the copy icon beside it and send it to them. They add it to their own calendar app, for example as described in Add public holidays or an outside calendar.
Anyone with the link can see your appointments, so only send it to people you trust. Turn the switch off to stop the link working.
Still stuck
Section titled “Still stuck”WhatsApp our support team at +60 16-916 3324.
Common issues
My colleague shared a calendar but I cannot see it.
Shared calendars do not appear on their own. Go to Settings > Sharing > Shared With Me, tick the calendar and click Attach.
Can I share my calendar with someone outside the company?
Sharing is for users on your Office Niaga Mail domain. For someone outside, turn on Allow others to subscribe to this calendar on the Details tab and send them the link it gives. They can view it in their own calendar app but cannot change it.
What does a colleague with Availability access see?
Only when you are busy or free, without the subject, place or notes of your appointments.
Was this article helpful?
Thanks for your feedback.
Sorry this didn't help. WhatsApp us and we'll sort it out with you.