
Ask an AI about this page
 ChatGPT
 Claude
 Perplexity
 Google AI Mode
 Microsoft Copilot
 Grok
Grok Mistral Le Chat
Publish a Power BI report and share it
Updated For Microsoft 365

When your report is ready in Power BI Desktop, select Publish and choose My workspace. The report is uploaded to the Power BI service, where you can open it at app.powerbi.com and share it with colleagues. You can publish to My workspace on the free licence, but sharing needs Power BI Pro, for you and for the people you share with.
We tested these steps on 27 September 2026 with Power BI Desktop on Windows 11, the sample report “Laporan Jualan” from build your first report, and an account on the free licence.
Before you start
Section titled “Before you start”You need three things before you publish:
- A saved report in Power BI Desktop. See build your first report.
- A work or school account. Gmail and other personal addresses are not accepted.
- A Power BI licence. The free licence (Microsoft Fabric free) is enough to publish to My workspace, and you can sign up for it on the way. To share, you need Power BI Pro. See which licence you need.
Publish from Power BI Desktop
Section titled “Publish from Power BI Desktop”Publishing uploads a copy of your report and its data to the Power BI service. The file on your computer stays as it is.
-
Open your report in Power BI Desktop and save it.
-
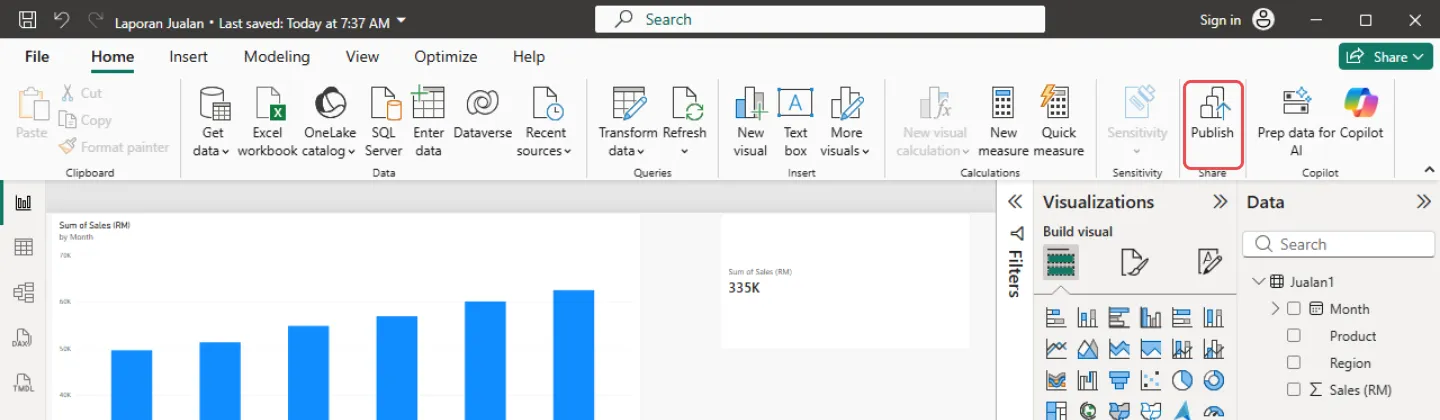
On the Home tab, select Publish. You can also select File → Publish → Publish to Power BI.
-
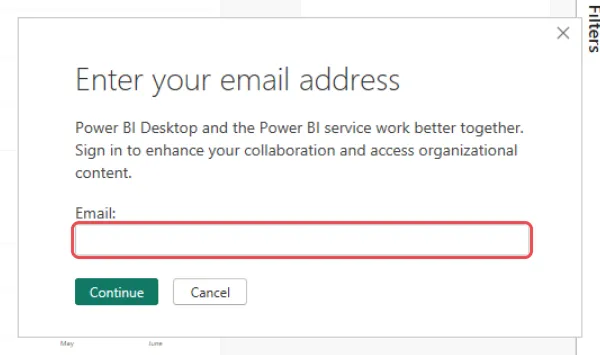
If you are not signed in, Power BI asks for your email. Type your work email and select Continue, then sign in with your password and two-step verification as usual. If Microsoft asks Sign in to all apps and websites on this device?, select No, this app only on a shared computer.
If your account already has a Power BI licence, go straight to choose where to publish.
If Power BI asks you to sign up
Section titled “If Power BI asks you to sign up”If your account has never used Power BI, Microsoft first asks you to sign up for the free licence. Power BI Desktop shows Check your browser to complete the Power BI sign up process.
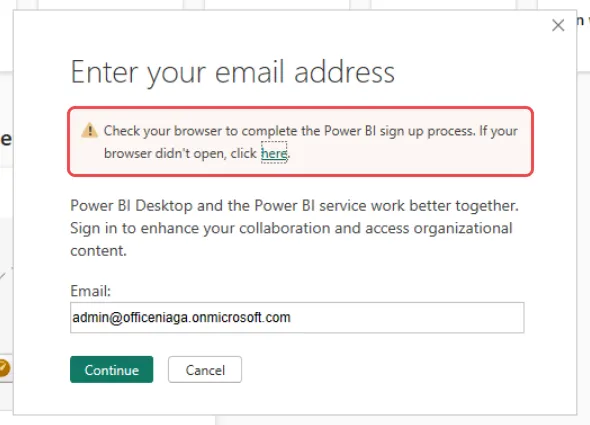
The sign-up takes three short steps in your browser:
-
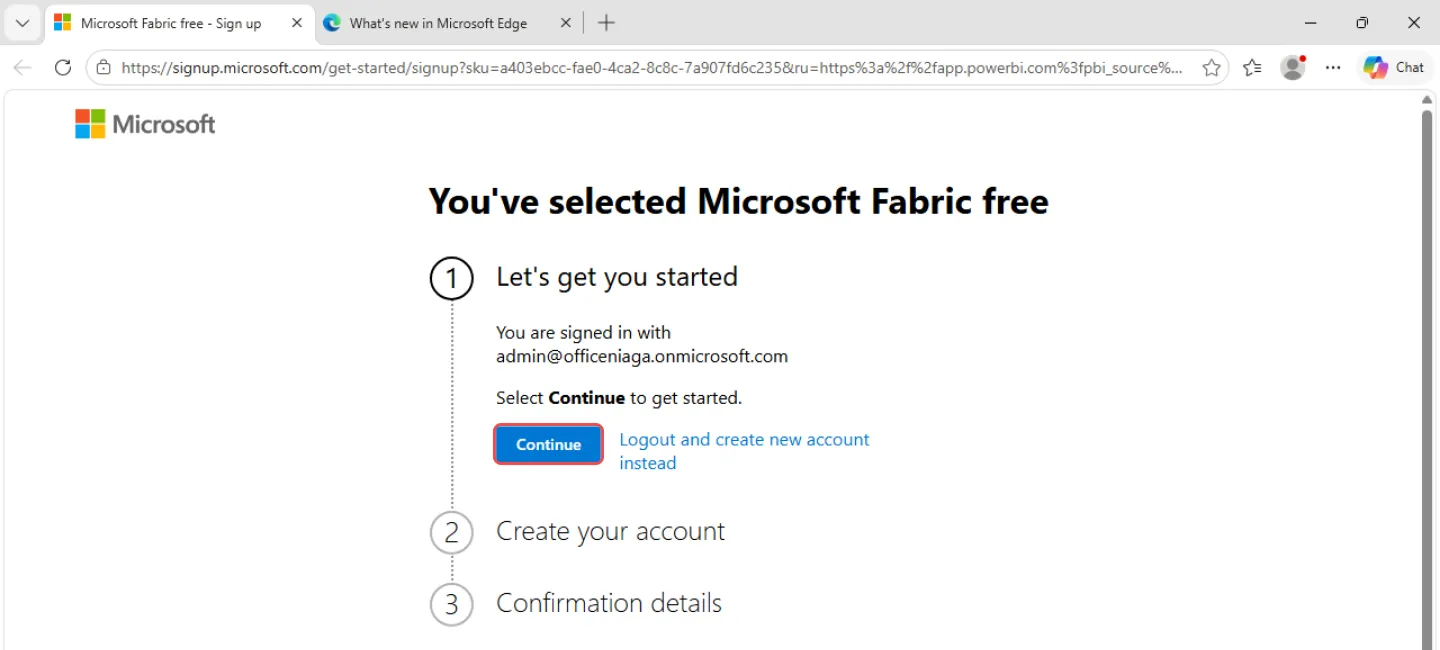
On the page You’ve selected Microsoft Fabric free, check it shows your work account, and select Continue.
-
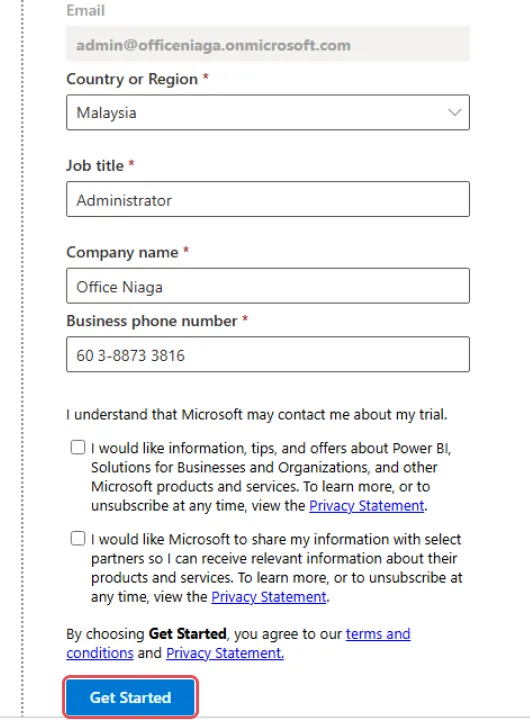
Under Create your account, choose Malaysia in Country or Region, and fill in Job title, Company name and Business phone number. Type the phone number with its area code, such as 03-8873 3816. The two tick boxes are for marketing emails from Microsoft and its partners: you can leave them unticked. Select Get Started.
-
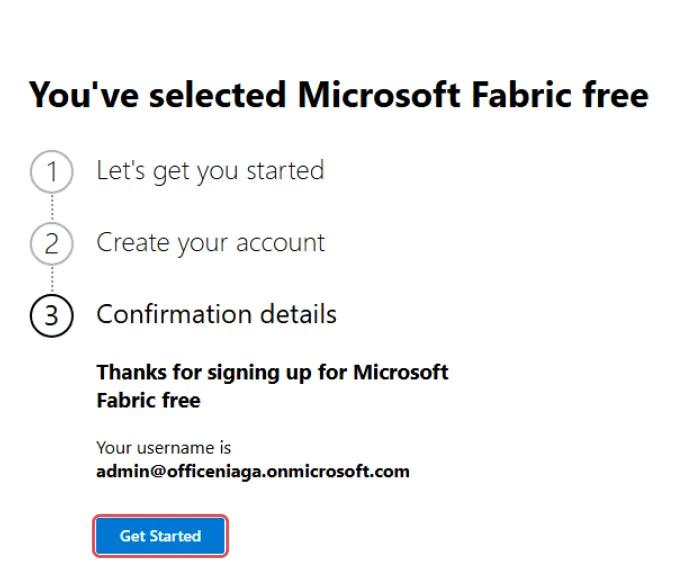
Microsoft shows Thanks for signing up for Microsoft Fabric free and your username. Select Get Started to open Power BI in your browser.
This sign-up is free, does not ask for payment and does not start a trial. When you finish, go back to Power BI Desktop and select Publish again. If Microsoft says sign-up is not allowed, your admin has turned self sign-up off. Ask your admin, or Office Niaga, to give you a licence instead.
Choose where to publish
Section titled “Choose where to publish”Once you are signed in with a licence, Power BI asks where to put the report.
-
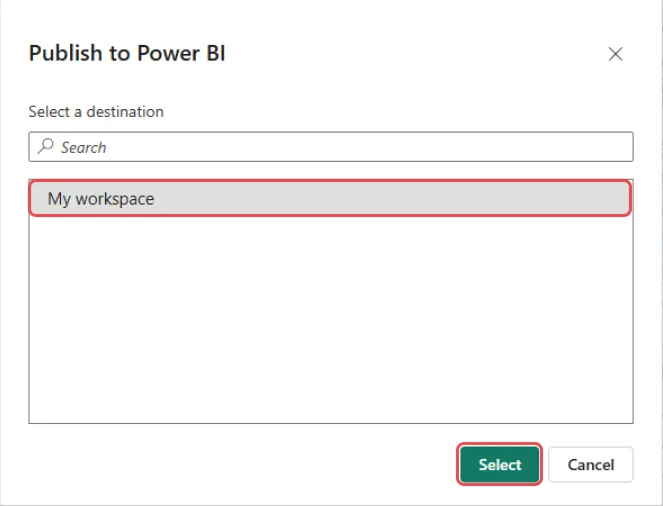
In Publish to Power BI, under Select a destination, select My workspace, then Select. If you have Pro and your company has shared workspaces, you can choose one of those instead.
-
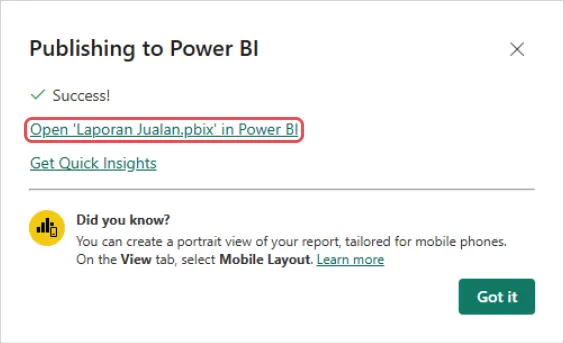
When publishing finishes, Power BI shows Success! with a link, such as Open ‘Laporan Jualan.pbix’ in Power BI. Select the link to open the report in your browser, or select Got it to close the box.
Open the report in the Power BI service
Section titled “Open the report in the Power BI service”The Power BI service is where you view published reports in a browser. Your own reports are in My workspace.
-
Go to app.powerbi.com and sign in with your work email.
-
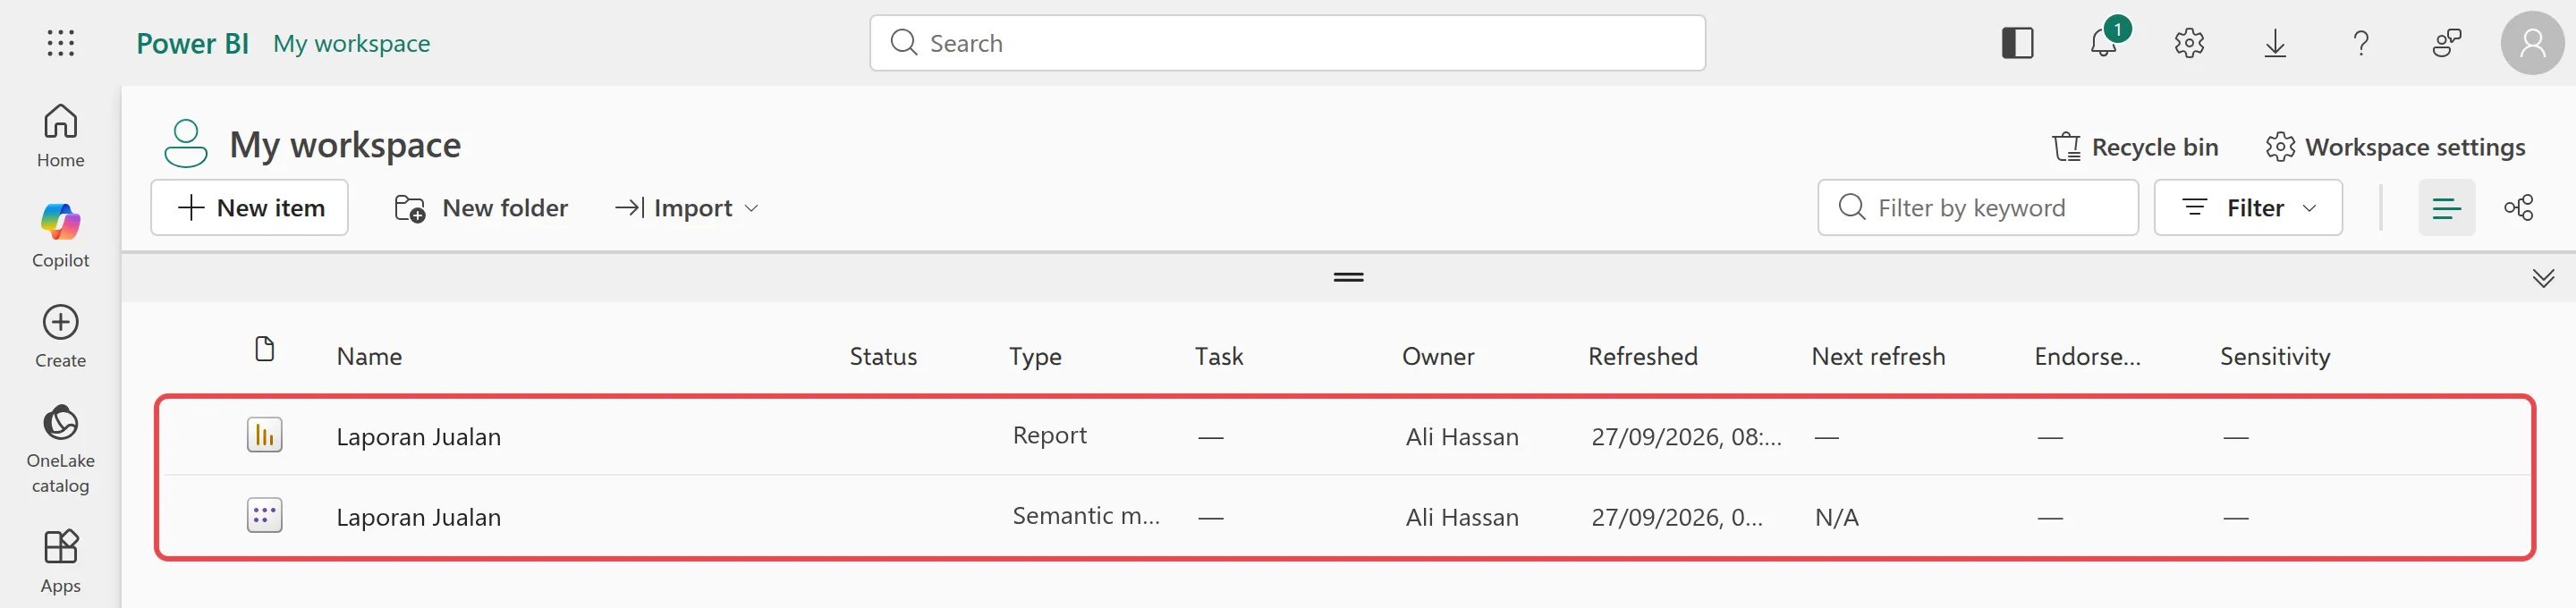
Select My workspace on the left. Your report is listed twice: once as a Report and once as a Semantic model.
-
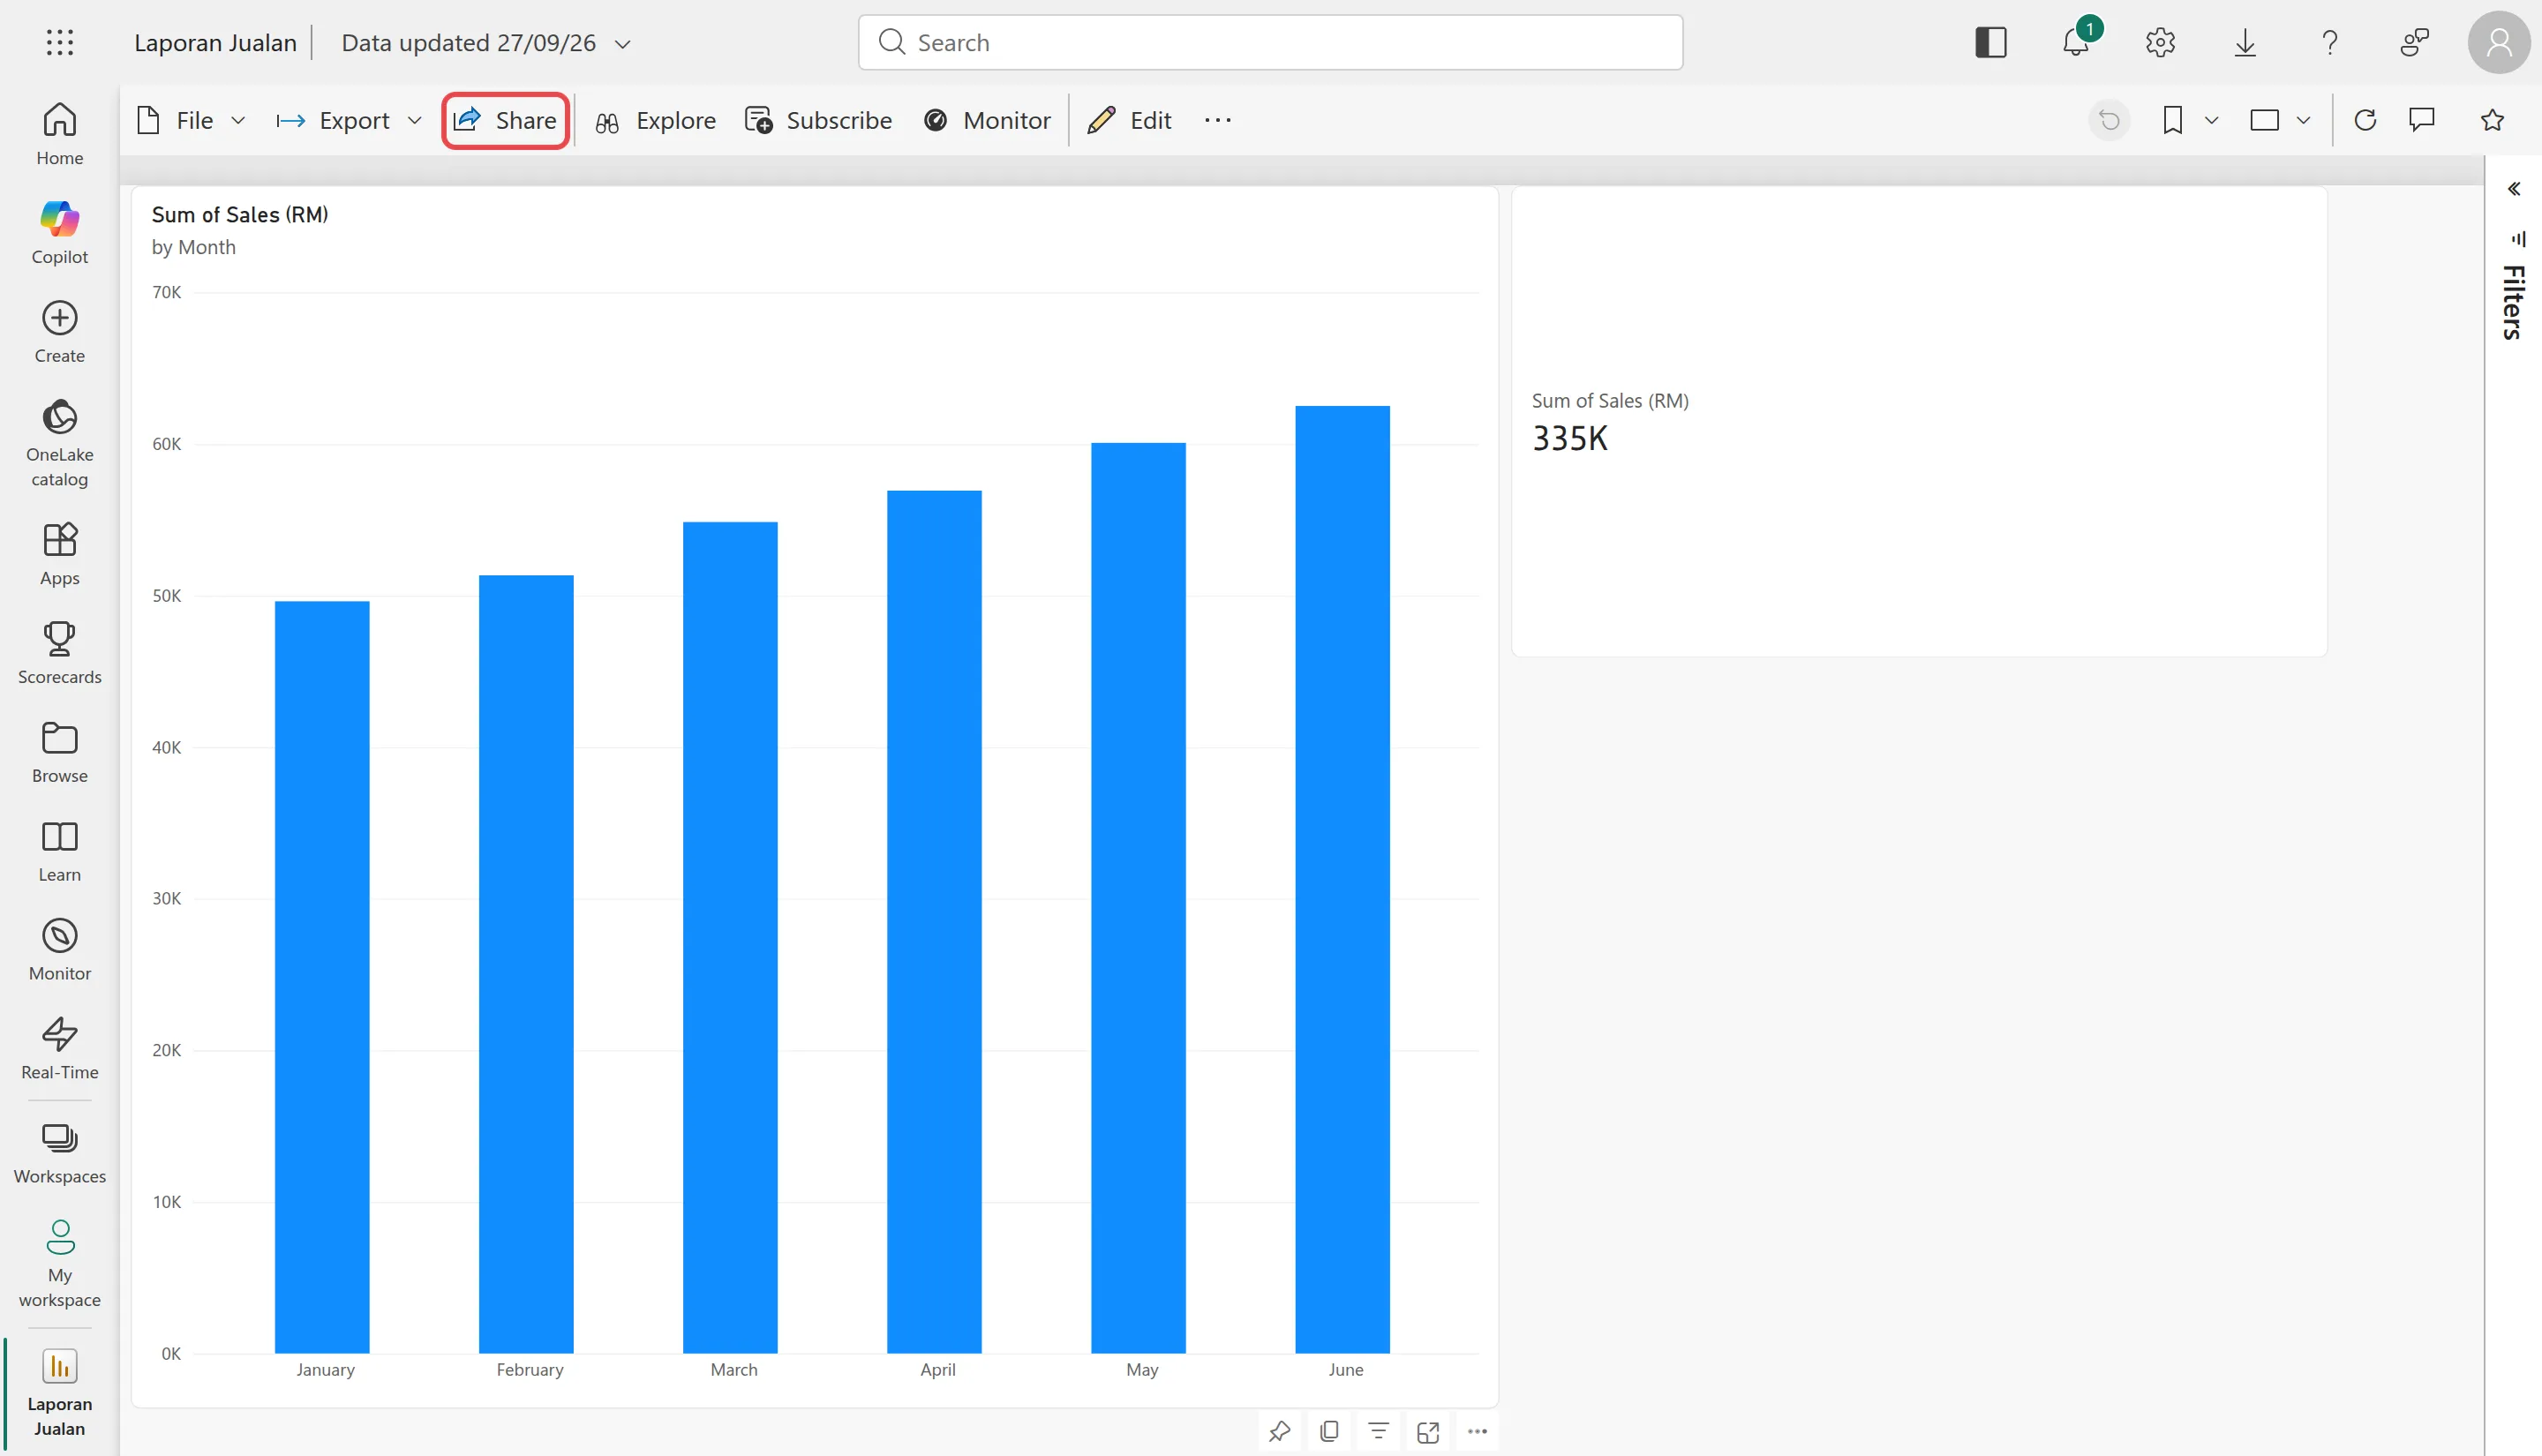
Select the Report to open it. Charts work as in Desktop: hover over a bar to see its value, or select it to filter the other visuals.
The semantic model holds the report’s data. Leave it in the workspace: the report needs it.
Share the report
Section titled “Share the report”Sharing sends colleagues a link to the report. They open it in their browser, or in the Power BI phone app, and always see the latest version you published. To share, open the report and select Share at the top.
On the free licence
Section titled “On the free licence”On the free licence, Share does not open the sharing box. Power BI shows Upgrade to a paid Power BI license instead, which says that sharing your reports with others is a paid feature.
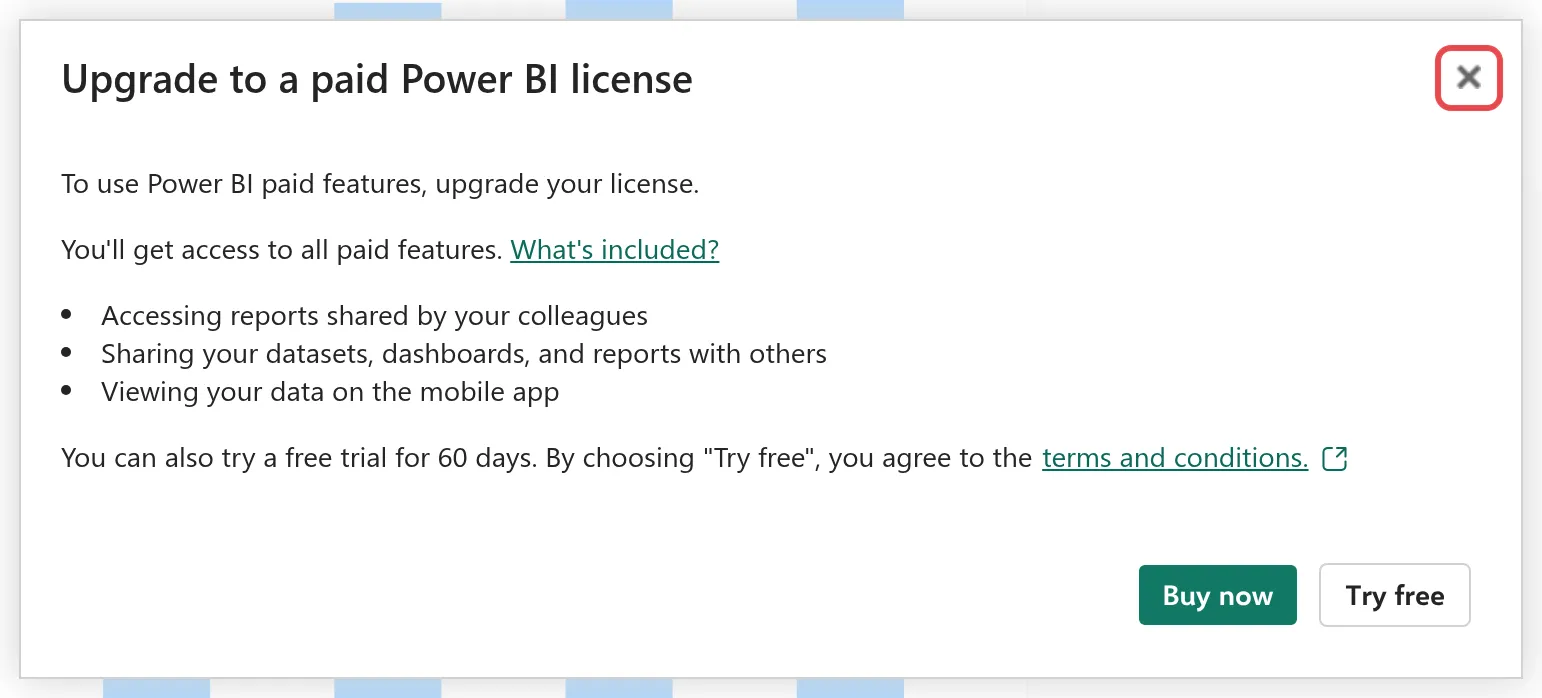
The box offers two buttons:
- Buy now takes you to buy Pro directly from Microsoft.
- Try free starts a 60-day Power BI trial.
To buy Pro through Office Niaga instead, close the box with the X and WhatsApp us. Your admin then assigns the licence: see assign a Power BI Pro licence. On the free licence you also cannot publish to shared workspaces: only My workspace is available to you.
With Power BI Pro
Section titled “With Power BI Pro”With Pro, Share opens the Send link box. Microsoft describes these steps:
- Choose who the link works for: People in your organization, Specific people or People with existing access.
- For Specific people, type their names or email addresses.
- Copy the link, or send it straight from the box by email, Outlook, PowerPoint or Teams.
In the link settings, Reshare lets the people you share with pass the report on to others, and Build lets them make their own reports from your data. Microsoft includes Reshare by default, so untick it if you do not want the report passed on.
The people you share with need a licence too. Microsoft says recipients “also need a Power BI Pro or PPU license, unless the content is in a Premium or Fabric capacity”. Only Premium capacity and Fabric capacity F64 or larger let colleagues on a free licence view shared reports.
Microsoft describes these steps in publish from Power BI Desktop and share reports and dashboards.
Still stuck
Section titled “Still stuck”WhatsApp our support team at +60 16-916 3324.
Common issues
Power BI Desktop says to check my browser to complete the Power BI sign up process.
Your account has no Power BI licence yet. Finish the Microsoft Fabric free sign-up in the browser window that opened, then select Publish in Power BI Desktop again. If the sign-up is blocked, your admin has turned self sign-up off: ask them, or Office Niaga, for a licence.
I selected Share and Power BI says Upgrade to a paid Power BI license.
That is the limit of the free licence: sharing needs Power BI Pro. Close the box with the X. To buy Pro through Office Niaga, WhatsApp us, and your admin then assigns the licence. See assign a Power BI Pro licence.
My colleague opened the link but cannot see the report.
The person you share with also needs Power BI Pro or Premium Per User, unless the report is in a workspace on Premium capacity or on Fabric capacity F64 or larger.
Does sharing a report share the Excel file too?
No. People see the report and can interact with it, but they do not get your .pbix or Excel file. The report shows the data as it was when you last published or refreshed it.
Was this article helpful?
Thanks for your feedback.
Sorry this didn't help. WhatsApp us and we'll sort it out with you.